
It’s now easier than ever to make a mobile game with Felgo, especially since the release of the Platformer Level Editor. This level editor is a Super Mario Maker style tool that lets game developers and players create their own levels in a matter of minutes. Now anyone can create their own levels with their mobile devices.
Of course, if you’d like to create your own mobile game, you’ll have to make code changes at some point. These 7 simple steps will help you morph the Platformer Level Editor example included in your Felgo installation into your own game.
To get started, open your Felgo installation folder and then navigate to this path: “…\Examples\Felgo\demos\PlatformerWithLevelEditor”. Copy this folder, paste it to your desktop and then rename it to “My Platformer”. If you haven’t downloaded Felgo yet (It’s Free), you can get it here!
Now we can make whatever changes we like to the demo without affecting the original example. This is helpful as you can always refer back to the original example for help. Open the folder, rename the Qt Project File to “My Platformer” as well and then open the file. Once Qt Creator opens, you can configure the project and start making your own mobile game.
Do you need any help with your mobile game development?
Felgo team is here to support you! We can cover the whole process from the first idea up to the release of your app in the stores.
Take advantage of our Mobile App Development Services and join the ranks of satisfied Felgo customers:

1. Toggle the Double Jump Feature
Some key features of any game are the abilities of the player. When you first try out the Platformer Level Editor demo, you’ll notice the player has the ability to perform a double jump. If you don’t want this feature in your own game, it can be changed very easily. We just need to make a couple of simple changes to the Player.qml code.
- Open the Player.qml file in the entities folder
- Press Ctrl + F to enable Qt Creator’s “Find” capabilities
- Search for
doubleJumpEnabled - Change
property bool doubleJumpEnabled: trueto
property bool doubleJumpEnabled: false - Find the next instances of
doubleJumpEnabledand make sure that they are also changed to equal a “false” setting
- Hit Ctrl + R to run the game example
The double jump feature will now be disabled! If you’d like to enable the feature again, you just need to change all the “false” settings back to “true”.
2. Adjust Your Mobile Game Physics
After your player settings, your in-game physics will be one of the most defining features of your game. In-game physics control the speed of your player, the strength of your game’s gravity and more. Adjusting your game’s physics is one of the easiest things to do when you create your own game with the level editor.
- Run the game example and select Levels from the main menu
- Press the green “Plus” button on the My Levels menu
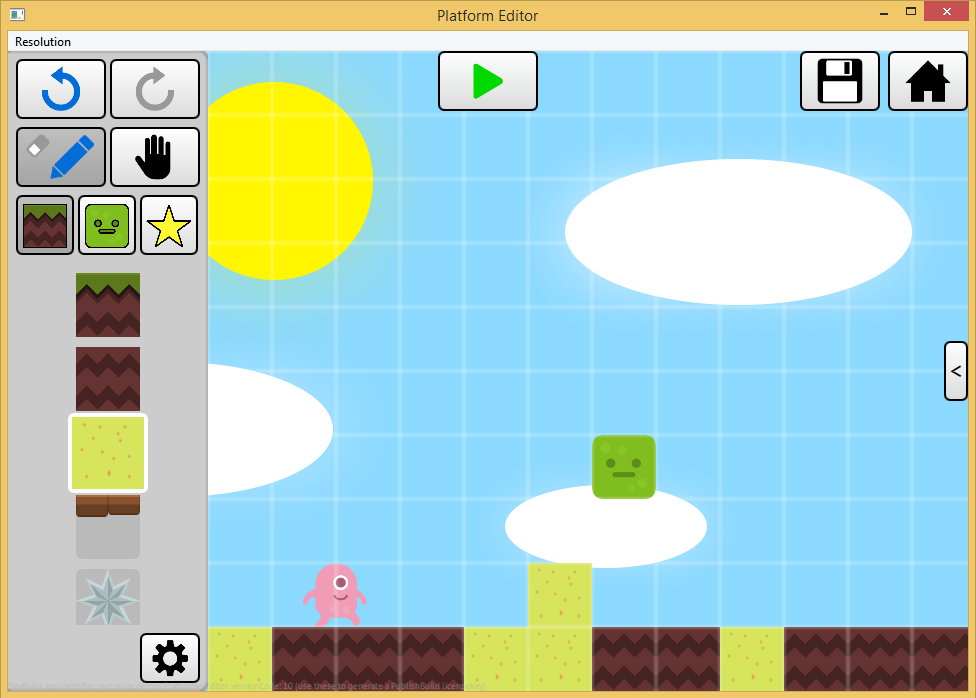
- You’ll now find yourself in level editor mode. Select the pencil tool and draw some ground for your character to stand on
- Now press the arrow button on the right hand side of the screen. This will open up the physics settings of your game.
- Adjust the Acceleration setting to 2000
- Press the green “Play” button at the top of the screen
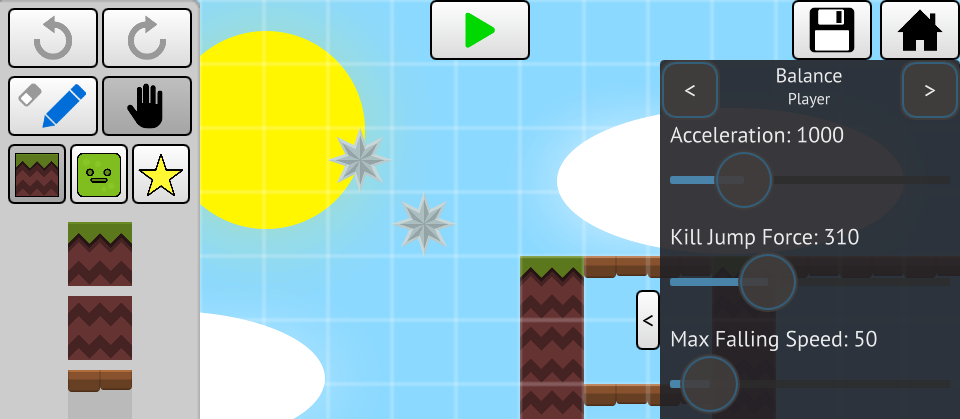
Now you can test out the new physics settings. If you’d like to make further adjustments, you can just press the arrow button on the left and edit the settings as you test. This is a great feature that makes creating your own game a much more intuitive process.
3. Personalize the UI
For the best results, you can create a personalized UI for your game. The Current UI of the Platformer Level Editor example goes well with the sample game but your user interface should suit your own game design. There are two main places where we can adjust the UI: in MenuScene.qml and in LevelScene.qml.
Making changes to the MenuScene.qml file will change the menu scene that appears when you start the game. The background of this scene is currently styled using this code snippet:
  // background
  Rectangle {
    id: background

    anchors.fill: parent.gameWindowAnchorItem

    gradient: Gradient {
      GradientStop { position: 0.0; color: "#4595e6" }
      GradientStop { position: 0.9; color: "#80bfff" }
      GradientStop { position: 0.95; color: "#009900" }
      GradientStop { position: 1.0; color: "#804c00" }
    }
   }
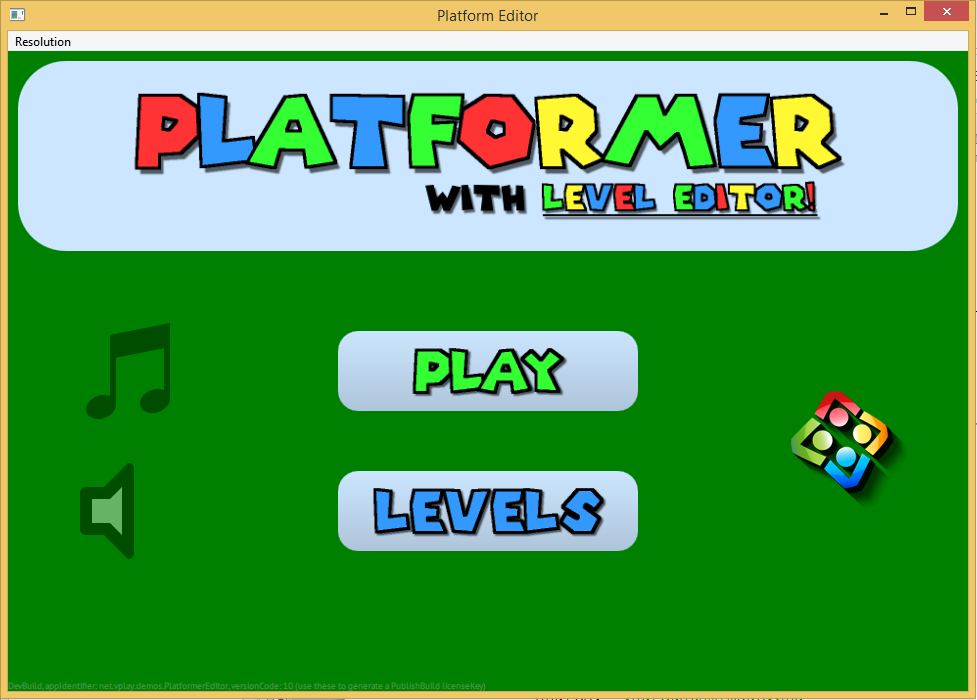
We’re going to change the background by replacing this code with this snippet to create a green background:
  // background
  Rectangle {
    id: background

    anchors.fill: parent.gameWindowAnchorItem

    color: "green"
  }
 }
Or else you can use a custom image like this:
  // background
  Rectangle {
    id: background

    anchors.fill: parent.gameWindowAnchorItem

    Image {
        source: "yourcustomimage.png"
    }
  }
You can adjust the background of LevelScene.qml in the same way.
If you’d like to change the buttons of the MenuScene.qml, you just need to create new image files and then change the image.source property of the PlatformerImageButton to point to the new image.
The PlatformerImageButton component is also used in the LevelScene file along with the PlatformerSelectableTextButton component. You can easily edit this button by changing its screenText property to say whatever you’d like.
Let’s change this:
 PlatformerSelectableTextButton {
    id: demoLevels

    screenText: "Demos"

    width: 80

    // this button is selected if the state is demoLevels
    isSelected: levelScene.state == "demoLevels"

    // set state to demoLevels
    onClicked: levelScene.state = "demoLevels"
}
To this:
 PlatformerSelectableTextButton {
    id: demoLevels

    screenText: "Felgo!"

    width: 80

    // this button is selected if the state is demoLevels
    isSelected: levelScene.state == "demoLevels"

    // set state to demoLevels
    onClicked: levelScene.state = "demoLevels"
}
And get this change:

These UI changes are easy to do and will give you the skills to change all of the other UI elements as well.
4. Customize Game Entities
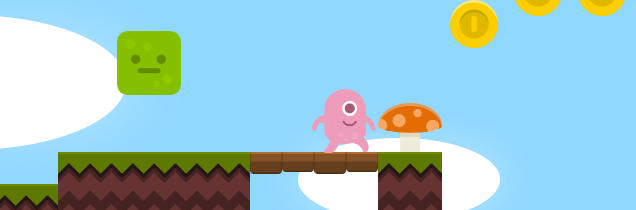
The platformer Level Editor comes with a number of predefined entities such as player enemies, power-ups and collectables. These entities cover the most common features of platformers and can be customized easily. This allows you to create a unique experience for your players and bring your game to life.
Let’s change the Mushroom.qml file so it looks like a burger. You can get the burger image asset from here.
The first thing to do is move the burger.png file to the correct directory. Locate the asset and then move it to the “…\Desktop\My Platformer\assets\powerups” folder. Then we need to update the code to make the burger appear in the game. Change this code from the Mushroom.qml file:
  // set image
  image.source: "../../assets/powerups/mushroom.png"
To this:
// set image
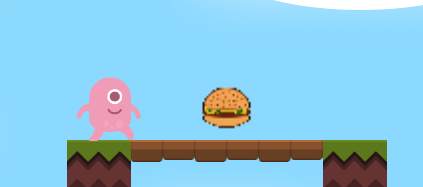
image.source: "../../assets/powerups/burger.png"
And now you have a burger power-up in your game!
To follow best practices, you should also include a scaled up version of the burger image in the hd+ folder. This will allow it to display properly on devices of different screen sizes and resolutions. You should also rename Mushroom.qml to Burger.qml and go through the code to make sure any mushroom references now relate to the burger.
You can do the exact same with player enemies, physical entities like the ground and platforms, and the level finish goal to create a game that looks completely different to the original Platformer Level Editor demo.
5. Add Game Entities
Besides customizing the existing game entities, you might want to add your own enemies or physical components. There are a few different ways to add these entities depending on what you’d like to achieve. This is the skill that really enables you to turn the example into your own game. The easiest entities to add are ground entities.
At the moment, there are two different types of ground; grass and dirt. Let’s add sand to the game. You can get the sand asset here. Once you have the file, move it to this folder: “…\Desktop\My Platformer\assets\ground”.
Next we’ll create a Sand.qml file. Right click on the entities folder from the project tree in Qt Creator and then click “Add new…”. From here we can create a new QML File (Qt Quick 2) that we’ll name “GroundSand”. Now we’ll copy the code from the GroundDirt.qml file and adjust the code to use the Sand.png asset.
Copy this code from GroundDirt.qml into GoundSand.qml:
import QtQuick 2.0
import Felgo 3.0

Ground {
  variationType: "grass"

  image.source: "../../assets/ground/ground_grass.png"
}
And then change the image.source property so it reads like this:
import QtQuick 2.0
import Felgo 3.0

Ground {
  variationType: "sand"

  image.source: "../../assets/ground/sand.png"
}
Now you need to update Sidebar.qml so the new asset shows up in the level editor when you want to make your game. First we need to change the buttons property so the sand is a selectable variation. This is the code snippet that you need to edit in Sidebar.qml:
// this property holds all BuildEntityButtons
// we use this in the unselectAllButtonsButOne() function
property var buttons: [groundButton, ground2Button, platformButton, spikeballButton, spikesButton, opponentJumperButton, opponentWalkerButton, coinButton, mushroomButton, starButton, finishButton]
We’re going to add a button called groundSandButton to this list:
// this property holds all BuildEntityButtons
// we use this in the unselectAllButtonsButOne() function
property var buttons: [groundButton, ground2Button, groundSandButton, platformButton, spikeballButton, spikesButton, opponentJumperButton, opponentWalkerButton, coinButton, mushroomButton, starButton, finishButton]
Further down the SideBar.qml file, we’re going to add the actual button component for GroundSand.qml. Find the BuildEntityButtons and then add a PlatformerBuildEntityButton to the list using this code:
PlatformerBuildEntityButton {
    id: groundSandButton

    visible: entityGroups.activeGroup == 1

    toCreateEntityTypeUrl: "../entities/GroundSand.qml"

    onSelected: selectBuildEntityButton(this)
    onUnselected: unselectBuildEntityButton()
}
An important thing to note here is the visible property, which will determine whether the asset shows up in the ground group, the enemy group or the power-up and collectables group. We want the sand to belong to entity group 1. Run your game and you’ll now find sand as an option when editing levels!
You can add more entities to the game by repeating this process. You just need to create a new qml file in the entities folder, and then add it as a variation in Sidebar.qml along with a button to make it selectable in the level editor.
6. Add Your Own Levels
When you’ve added your own entities, customized the UI and made some general game design decisions, you’ll want to start creating your own levels. The first thing to do is delete the levels that come preloaded with the example. To do this:
- Expand the “Other Files” directory in your project tree.
- Expand the “qml” directory underneath
- Expand the “levels” directory
- Right click each of the .json files and select “Delete File…” for each of the levels
- Navigate to the following folder on your system, “…\Desktop\My Platformer\qml\levels”
- Delete the 4 .json files from this folder. Do not delete the folder.
Once you’ve completed these steps, the 4 levels that come with the example will be removed from the game. In order to create some levels for your game, you need to add a button component to your GameScene.
Open the PlatformerWithLevelEditorMain.qml file and find the GameScene component. It looks like this:
GameScene {
    id: gameScene

    onBackPressed: {
      // reset level
      gameScene.resetLevel()

      // switch to levelScene
      gameWindow.state = "level"
    }
  }
You’re going to add a button to this component that will allow you to export your custom made levels from the level editor to your documents folder. Replace the above code snippet with this:
GameScene {
id: gameScene
onBackPressed: {
// reset level
gameScene.resetLevel()
// switch to levelScene
gameWindow.state = "level"
}
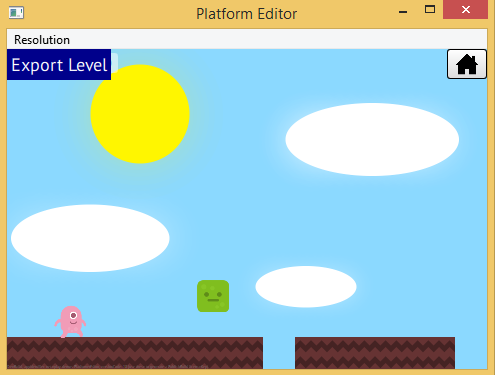
SimpleButton {
text: "Export Level"
onClicked: levelEditor.exportLevelAsFile()
}
}
This adds a button to the level editor that allows you to export all your levels. Just hit “Export Level” when you’re happy, navigate to your documents folder and copy the JSON files to your levels folder.
It’s helpful to rename the new levels you create as they’re all exported with the same file name. Renaming them will prevent old levels being overwritten or duplicates being created. Your custom made levels are now saved and packaged with your game!
7. Include the Felgo Game Network
If you’re finished creating your game, there’s one more thing you should do before publishing. The Felgo Game Network is a free feature that enables you to include leaderboards and achievements in your game.
The Platformer Level Editor is a great retention tool as it allows your players to create new game content, so there’s always something new to do. By adding the Felgo Game Network, you can increase this retention even more by building a competitive community around your game.
Adding the Felgo Game Network to your game is a simple process that can be completed in about 10 minutes but have a lasting effect on your game.
Check out this tutorial to find out how to take advantage of one of the best features Felgo has to offer.
Create Your Own Mobile Game with Felgo
So there you have it. With this simple guide you can make your own mobile game in the shortest time possible. If you’ve followed this guide and released your own game in this way, let us know in the comments. Make sure to share this article with your Facebook friends and Twitter followers!
Explore Level Editor Benefits!
More Posts like This
How to Make a Game like Super Mario Maker with Our New Platformer Level Editor
![]()
16 Great Sites Featuring Free Game Graphics for Developers
The 13 Best Qt, QML & Felgo Tutorials and Resources for Beginners
21 Tips That Will Improve Your User Acquisition Strategy

References
- https://www.youtube.com/watch?v=65SQoW2Jd94
- https://felgo.com/download/
- http://felgo.com/level-editor/
- http://felgo.com/doc/v-play-demos-platformerwithleveleditor-qml-entities-player-qml/
- http://felgo.com/doc/v-play-demos-platformerwithleveleditor-qml-scenes-menuscene-qml/
- http://felgo.com/doc/v-play-demos-platformerwithleveleditor-qml-scenes-levelscene-qml/
- http://felgo.com/doc/v-play-demos-platformerwithleveleditor-qml-common-platformerimagebutton-qml/
- http://felgo.com/doc/v-play-demos-platformerwithleveleditor-qml-common-platformerselectabletextbutton-qml/
- http://felgo.com/doc/v-play-demos-platformerwithleveleditor-qml-entities-mushroom-qml/
- http://opengameart.org/sites/default/files/burger.png
- http://felgo.com/doc/v-play-demos-platformerwithleveleditor-qml-entities-grounddirt-qml/
- http://felgo.com/doc/v-play-demos-platformerwithleveleditor-qml-editorelements-sidebar-qml/
- http://felgo.com/doc/v-play-demos-platformerwithleveleditor-qml-editorelements-platformerbuildentitybutton-qml/
- http://felgo.com/doc/v-play-demos-stacktheboxwithcommunityeditor-qml-scene-game-gamescene-qml/
- http://felgo.com/doc/vplay-group/#v-play-game-network-components
- http://felgo.com/doc/vplay-vplaygamenetwork/#how-to-add-v-play-game-network-to-your-game


