You have a great idea for a mobile application, but you're unsure about the technologies you should use? Don’t worry, this comparison covers all you need to choose the right framework for this adventure. Here’s what you’re in for:
- Why Consider Cross-Platform Development Instead of Native Development?
- Development and Programming Languages
- Real-World App Examples
- Rendering, Animations and Performance
- Conclusion
Why Consider Cross-Platform Development Instead of Native Development?
There are a lot of technological choices to make when starting a new project. Knowing that the development framework you choose might make or break your application, in the long run, makes it even harder. So let’s take a deep breath and start from the beginning. Before comparing solutions, we first need to understand what cross-platform frameworks do and why they are so popular.
Before the rise of cross-platform solutions, you would create a purely native application, which is still an option now. There are advantages and disadvantages to this approach as well. So the first question we ask ourselves is: “Should I develop a native mobile application or choose a cross-platform framework?”
Over the past years, interest in native development slowly declined while cross-platform solutions like React Native or Flutter are becoming more and more popular.

(Chart by Google Trends)
This is linked to the reductions in application costs and time to market. Cross-platform solutions are also increasing your audience since you're able to target multiple platforms at the same time.
So let’s look deeper into the advantages and disadvantages of the approaches:
Advantages of Native Mobile App Development
- Smallest minimum app size. <10MB, as there is no size overhead
- When optimized, native apps provide the best performance
- Direct access to the platform’s full feature-set
Disadvantages of Native Mobile App Development
- Requires separate code for every platform, or even separate development teams
- Higher upfront and maintenance costs
- Hard to create custom user interfaces that don’t follow the platform style
Advantages of Cross-Platform App Development
- Write code only once for all platforms and maintain a single codebase
- Apps can use the platform style or fully custom UI
- Native performance is still possible (with the right framework)
Disadvantages of Cross-Platform App Development
- Cross-platform solutions add some overhead to the app size
- They lag behind native development when it comes to accessibility of native features
Many cross-platform frameworks have been developed in recent years and we are going to analyze three of them. React Native is very popular and has the biggest community, while Flutter is the new, growing power-horse from Google. Felgo simplifies and streamlines the creation of mobile apps with Qt, and also supports Desktop and Embedded platforms. To start with, let’s take a look back at the history of these technologies.
History of the Mobile App Development Frameworks
Felgo

Felgo is a very mature framework. It was conceived in 2012 and evolved into a full blown mobile application framework by 2015. It is the go-to solution for mobile app development with Qt ever since.
As a Qt Technology partner, Felgo adds many components to simplify the creation of mobile apps that look native on both iOS and Android. Moreover it enables the development of state-of-the-art user experiences for Desktop, Embedded and Web (WebAssembly).
Felgo relies on QML for rapid UI development. It’s a powerful language that lets you flexibly compose your UIs, with JavaScript taking care of your application logic. The source code is then compiled into native Android and iOS applications.
To achieve this, Felgo strongly relies on Qt: hands down the best C++ cross platform solution out there. Qt has been around for decades and is continuously evolving and improving. A huge and very active community advances it in countless projects, from embedded applications to full featured desktop applications. However, as Qt is lacking important features for mobile app development, Felgo stepped in to provide all the things you need on top of Qt.
The tooling support is solid and based on the Qt Creator IDE. Felgo enhances the experience with added features such as QML Hot Reload, Project Wizards and Demos, Plugin Integrations, or Cloud Builds.
Take a look at how some of the applications that are built-in Felgo look. Check them out here.
Flutter

Flutter is an open source framework developed by Google and was released to the public in 2017, so it’s the newer of the bunch. Similar to Felgo, it is composed of custom components, developed to look and feel like natives ones. Flutter is running on a custom Skia based engine.
It uses Dart as the main language, with first party support in AndroidStudio and VisualStudio Code. It compiles directly to native Android and iOS apps and supports Hot reload for faster prototyping on simulators or physical devices. Desktop components are available, although currently in alpha state.
You can check out some cool Flutter app examples here.
React Native

React Native is the last alternative we’re going to analyze. Developed by Facebook back in 2015, it’s driven by a JavaScript engine and outputs UIs which are indistinguishable from native apps.
Development is done via supported text editors such as Atom.io and VisualStudio Code.
If you want to see how React Native application examples look out in the wild, check this out.
High-level App Development Framework Comparison
We can already start to outline major differences in some key areas:
Programming language
Flutter uses Dart, a brand new language developed by Google for web development.
Felgo employs QML for declarative definition of UI elements and JavaScript or C++ for the application logic. QML extends JavaScript with type safety (like TypeScript) and reactive programming features - the so called property bindings - to be more efficient with less code.
React Native makes use of JavaScript and JSX which will look very familiar for those who have used the Web components.
Supported platforms
Flutter supports iOS, Android and Web, with desktop components currently in alpha stage.
Felgo supports iOS & Android, as well as Desktop platforms Windows, Mac OS and Linux distributions like Ubuntu. Felgo also works on Linux based Embedded platforms like the Raspberry Pi or Arduino, and even on the Web with WebAssembly.
React Native targets Android and iOS devices, although you can share part of the application code with the Web version. Experimental community extensions for desktop applications are also available.
Development Tools
With Flutter, you develop your apps inside Android Studio or Visual Studio Code. Excellent plugins such as Hot Reload and command-line utilities are also available.
Felgo employs the QtCreator IDE, which includes a visual UI editor with drag-and-drop support. You can see changes immediately on your desktop or mobile using the Live Reloading. This reduces development time, as you save the time of re-deploying the whole application. Another benefit of Felgo is that you can simulate mobile UIs on different platforms, and you can even change styling at runtime.
On top of this Felgo offers some services such as Cloud Builds or Web IDE. The former eases the deployment from the repository to stores, while the second enables fast online prototyping.
React Native uses custom plugins for text editors such as Atom.io or Visual Studio Code. A very nice Web editor is available, but overall, tooling support doesn’t feel as polished and integrated as the competition.
Compiled code & performance
Dart and thus Flutter uses ahead-of-time (AOT) compilation to transform your code into native binaries for each architecture.
Felgo uses the QML engine to just-in-time (JIT) compile the QML code. You can also enable AOT compilation with the Qt Quick Compiler to achieve faster performances and reduced start-up times.
React Native uses a fast JavaScript (JIT) compiler on supported platforms and falls back to interpreting when not possible.
All considered, you shouldn't expect major performance differences between Felgo, Flutter, or React Native.
Feature
Flutter
React Native
Felgo
Public Release
Flutter
2018
React Native
2015
Felgo
2012
Custom rendered UI / widgets / animations
Flutter
yes
React Native
no
Felgo
yes
Native rendered UI
Flutter
no
React Native
yes
Felgo
no
Programming Language
Flutter
Dart
React Native
JSX & JS
Felgo
QML & JS & C++
Hot Code Reload
Flutter
yes
React Native
yes
Felgo
yes
Development IDEs
Flutter
Android Studio, Visual Studio Code
React Native
Atom, Sublime Text, Visual Studio Code
Felgo
Qt Creator, Visual Studio, Web IDE
Visual UI Editor
Flutter
no
React Native
yes (3rd party)
Felgo
Qt Quick Designer
Remote App Update
Flutter
no
React Native
yes
Felgo
yes
Shared UI Code across platforms?
Flutter
yes (but not entirely)
React Native
no
Felgo
yes
Supported Platforms
Flutter
iOS, Android, Desktop (Alpha components)
React Native
iOS, Android, Desktop (via Electron), Web (via sharing the app’s logic, if done right)
Felgo
iOS, Android, Desktop (Windows + Mac + Linux), Embedded (e.g. Raspberry Pi, Arduino, i.MX6, ...), Web
Support
Flutter
None (community only)
React Native
None (community only)
Felgo
Enterprise Support Level & SLA available
License
Flutter
Multiple Licenses
React Native
MIT (Dependencies might have different licenses)
Felgo
Felgo: Closed-source free version, source code available for commercial customers. Qt: LGPL & Commercial
Release Cycle
Flutter
~1-2 updates per month
React Native
Frequent updates, backwards compatibility breaks
Felgo
~6-10 updates per year, long-time-supported versions
Development and Programming Languages
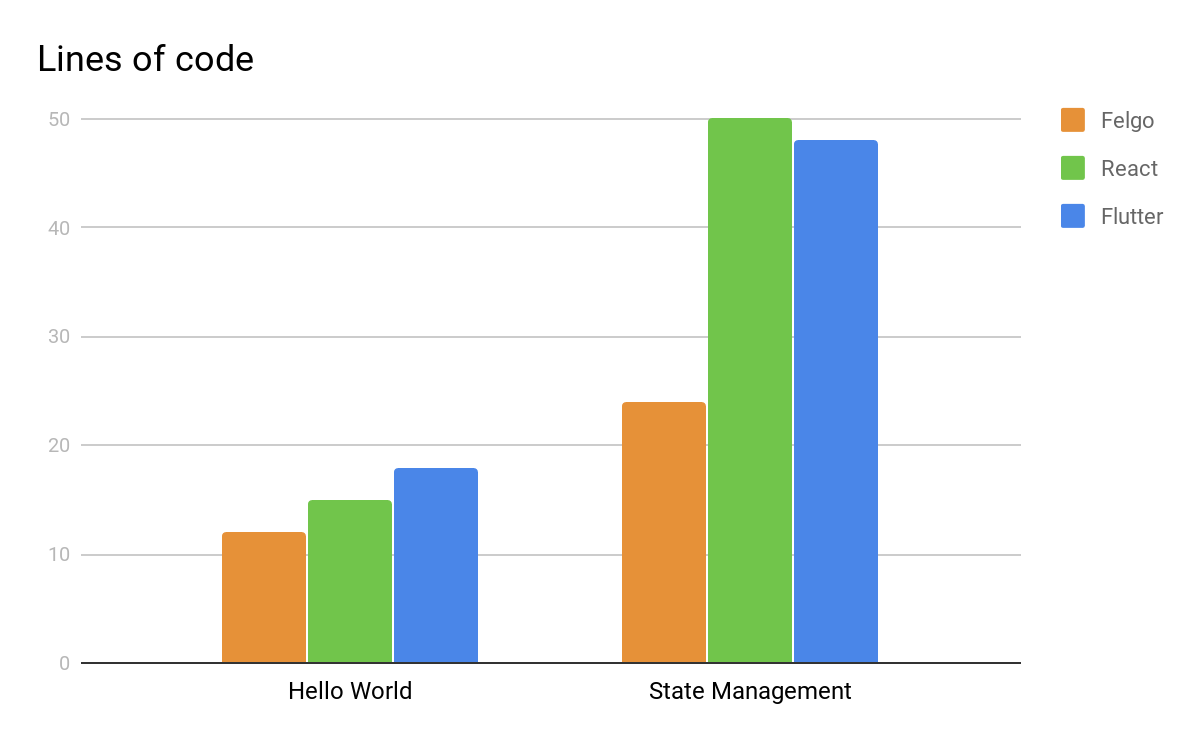
Now that we have a very high level understanding of these frameworks, we can start diving into some code. Is there a better place to start than the “Hello World” example?
How to Say “Hello World”?
Felgo
This is how a simple QML application with Felgo looks like:
import Felgo 3.0

App {
  NavigationStack {
    Page {
    title: qsTr("Welcome to Felgo")
      AppText {
        anchors.centerIn: parent
        text: "Hello World"
      }
    }
  }
}
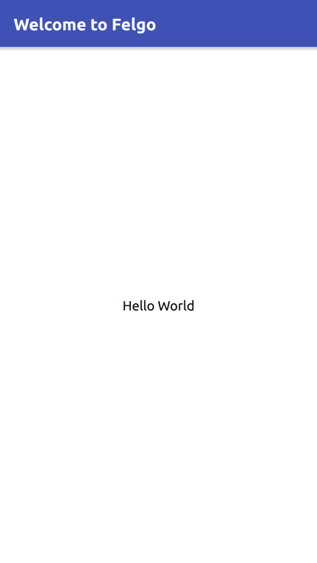
QML is a declarative language and we are building up a tree of components. Everything starts with a single import line which makes all components from the Felgo SDK available. We define a NavigationStack, which allows navigating to different pages in our application. Our example page holds a simple title and the mandatory “Hello World” text, positioned at the center of the page. It’s a complete Hello World application in just 12 lines of code.
Using Hot Reload you’ll be able to launch this project and see it running immediately on your development machine. You’ll also be able to connect mobile devices on your local network if you install the Felgo Live application (Android, iOS). Any saved change you make in your code will be pushed immediately to connected devices, which will update the changed parts of your UI without losing the current application state.
You can also change the styling of those widgets at runtime, to see the native appearance of an Android, iOS or Desktop application.
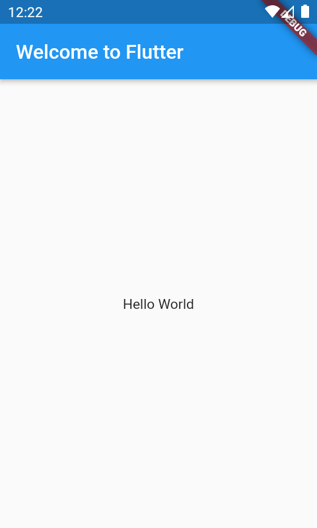
Flutter
The Flutter implementation is a little bit more verbose, but also extremely straightforward:
import 'package:flutter/material.dart';

void main() => runApp(MyApp());

class MyApp extends StatelessWidget {
  @override
  Widget build(BuildContext context) {
    return MaterialApp(
      title: 'Welcome to Flutter',
      home: Scaffold(
        appBar: AppBar(
          title: Text('Welcome to Flutter'),
        ),
        body: Center(
          child: Text('Hello World'),
        ),
      ),
    );
  }
}
Dart looks more like a standard programming language, with a tree of components defined in a purely imperative way in the build function.
We import the Material widgets in the first line of code. This is the first important difference we see compared to Felgo. Material Components are designed specifically to look native on Android. They can be drawn under any platform, but they’ll look out of place on those platforms.
To achieve the iOS native look and feel, you need to import Cupertino components. These components have a different API so they require different code paths. To provide a native look on both platforms, a separate UI implementation is required.
At 18 lines of code, this is a tad more verbose compared to the Felgo implementation.
Although differences might arise for the UI, you will still be able to share most of the application code across the two versions.
React Native
Now let’s take a look at the React Native variant:
import React from 'react';
import { Text, View } from 'react-native';

function HelloWorldApp() {
 return (
   <View
     style=>
     <Text>Hello, world!</Text>
   </View>
 )
}
export default HelloWorldApp;
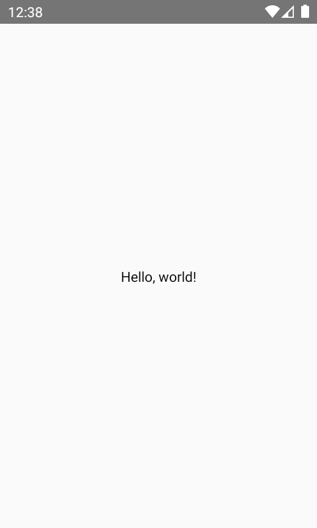
The implementation is very simple as well. We import React Native libraries and we compose the UI using JSX (a way to embed xml tags into JavaScript).
In terms of lines of code, it’s positioned between the competitors at 15 lines of code.
As with Flutter, React Native uses different widgets for Android and iOS. As each component is mapped to an actual native platform component, not everything can be used and rendered on both platforms. For example, the View and Text components are compatible on both iOS and Android, but we are missing the toolbar which would only work on Android. As complexity grows, you will be forced to use separate code branches to handle different components.
State Management
While “Hello Word” is a great starting point, it’s by no means enough to start writing a real world application. Real applications need to manage some kind of data, and this data is represented by your application state.
Data handling and state management are a key aspect of all applications. Each framework handles it differently, so let’s take a look:
Felgo
Felgo manages the state via properties, defined in QML:
import Felgo 3.0
import QtQuick 2.0

App {
  NavigationStack {
    Page {
      property int numClicks: 0
      id: page
      title: "Page with state"

      Column {
        spacing: dp(16)
        anchors.centerIn: parent

        AppButton {
          anchors.horizontalCenter: parent.horizontalCenter
          text: "Click me"
          onClicked: page.numClicks++
        }
        AppText {
          anchors.horizontalCenter: parent.verticalCenter
          text: "You clicked me " + page.numClicks + " times!"
        }
      }
    }
  }
}
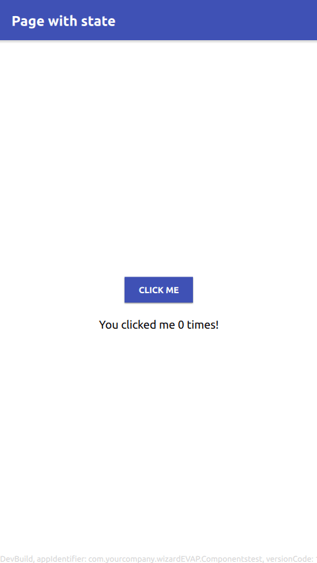
Properties are typed variables with the very important power of property binding.
In this example a numClicks property is declared inside the page item. Whenever the AppButton is clicked, the onClicked slot is triggered and increments the numClicks counter.
Now, just take a look at the AppText text property. We can see that its value holds an expression that relies on the page.numClicks property. While this expression looks like an assignment, in reality it is a binding that follows the observer pattern. Every time the numClicks property changes the text property automatically updates as well and computes the new value. This feature helps to avoid inconsistencies and always keeps your UI in sync with your data - pretty nice!
You can define such dependencies across multiple properties and Qt will take care of updating the entire hierarchy when a node changes. This is also run in a separate thread so that the main UI thread doesn’t get blocked by such calculations.
But remember, with great power comes great responsibility. You should keep in mind that code for such binding expressions might run many times if the properties change often. Keeping the logic as simple as possible avoids delays in the propagation of these updates.
The Felgo implementation is still the most compact, with just 24 lines of code.
Flutter
In contrast to QML, both Flutter and React Native adopt a much more explicit approach to state management by exposing a setState method.
Flutter takes it even further by requiring widgets that have some form of state to inherit from StatefulWidget:
import 'package:flutter/material.dart';

void main() {
  runApp(MyApp());
}

class MyApp extends StatelessWidget {
// This widget is the root of your application.
  @override
  Widget build(BuildContext context) {
    return MaterialApp(
      title: 'Page with state',
      home: MyHomePage(title: 'Page with state'),
    );
  }
}

class MyHomePage extends StatefulWidget {
  MyHomePage({Key key, this.title}) : super(key: key);

  final String title;

  @override
  _MyHomePageState createState() => _MyHomePageState();
}

class _MyHomePageState extends State<MyHomePage> {
  int numClicks = 0;

  void _incrementCounter() {
    setState(() { numClicks++; });
  }

  @override
  Widget build(BuildContext context) {
    return Scaffold(
      appBar: AppBar(
        title: Text(widget.title),
      ),
      body: Center(
        child: Column(
          mainAxisAlignment: MainAxisAlignment.center,
          children: <Widget>[
            RaisedButton(
              onPressed: _incrementCounter,
              child: Text('Click me'),
            ),
            SizedBox(height: 16),
            Text(
              'You clicked me $numClicks times!'
            ),
          ],
        ),
      ),
    );
  }
}
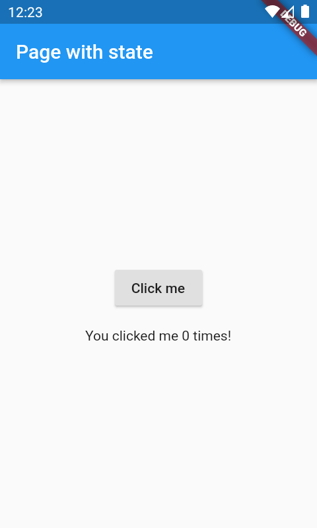
StatelessWidgets are not allowed to have any state so they are guaranteed to look and behave the same after a reload.
MyHomePage is a StatefulWidget because it contains the numClicks variable. Every time we want to change its state we call the setState method. This will mark the view as dirty, causing a redraw in the next frame.
This very explicit API allows Flutter Hot Reload to accurately restore the previous state when e.g. reloading the application with Hot Reload. The main drawback of this approach is the verbosity; at 48 lines of code this sample doubles the length of the Felgo implementation.
React Native
As mentioned above, state management is very explicit with React Native as well and its version of the setState method:
import React, { Component } from 'react'
import {
  StyleSheet,
  TouchableOpacity,
  Text,
  View,
} from 'react-native'

class App extends Component {
 state = {
   count: 0
 }

 onPress = () => {
   this.setState({
     count: this.state.count + 1
   })
 }

 render() {
   return return (
     <View style={styles.container}>
       <TouchableOpacity
        style={styles.button}
        onPress={this.onPress}
       >
        <Text>Click me</Text>
       </TouchableOpacity>
       <View style={styles.countContainer}>
         <Text>
           You clicked { this.state.count } times!
         </Text>
       </View>
     </View>
   )
 }

}

const styles = StyleSheet.create({
 container: {
   flex: 1,
   justifyContent: 'center',
   alignItems: 'center',
 },
 button: {
   alignItems: 'center',
   backgroundColor: '#DDDDDD',
   padding: 10,
   marginBottom: 10
 }
})

export default App;
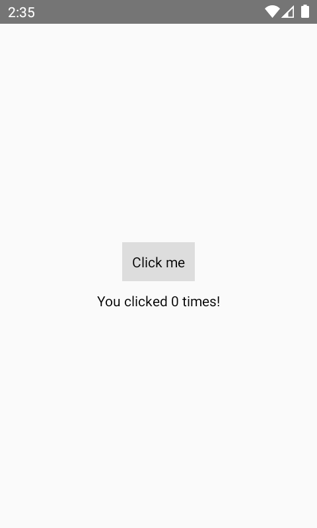
The main difference here lies in how the system implements redraw. React Native leverages the virtual DOM, a JavaScript construct which contains the current state of widgets. Any change to the virtual DOM needs to be synchronized with the underlying native widgets to display them on screen. The total sample length is 50 lines of code, and it’s comparable with the Flutter implementation.
Gathering all together
We just saw some very tiny applications, but a pattern is starting to emerge. Felgo applications are generally shorter. The same result can be achieved in very few lines of code as you can see from this table:
Real-World App Examples
As we now have all the basic building blocks, we can compare some “real world” applications created with all the three frameworks.
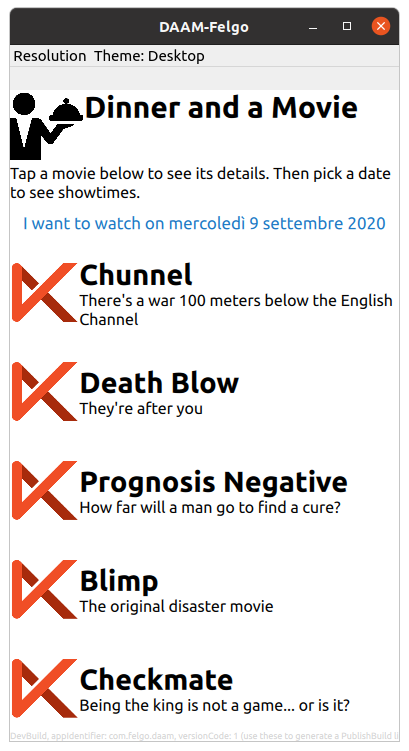
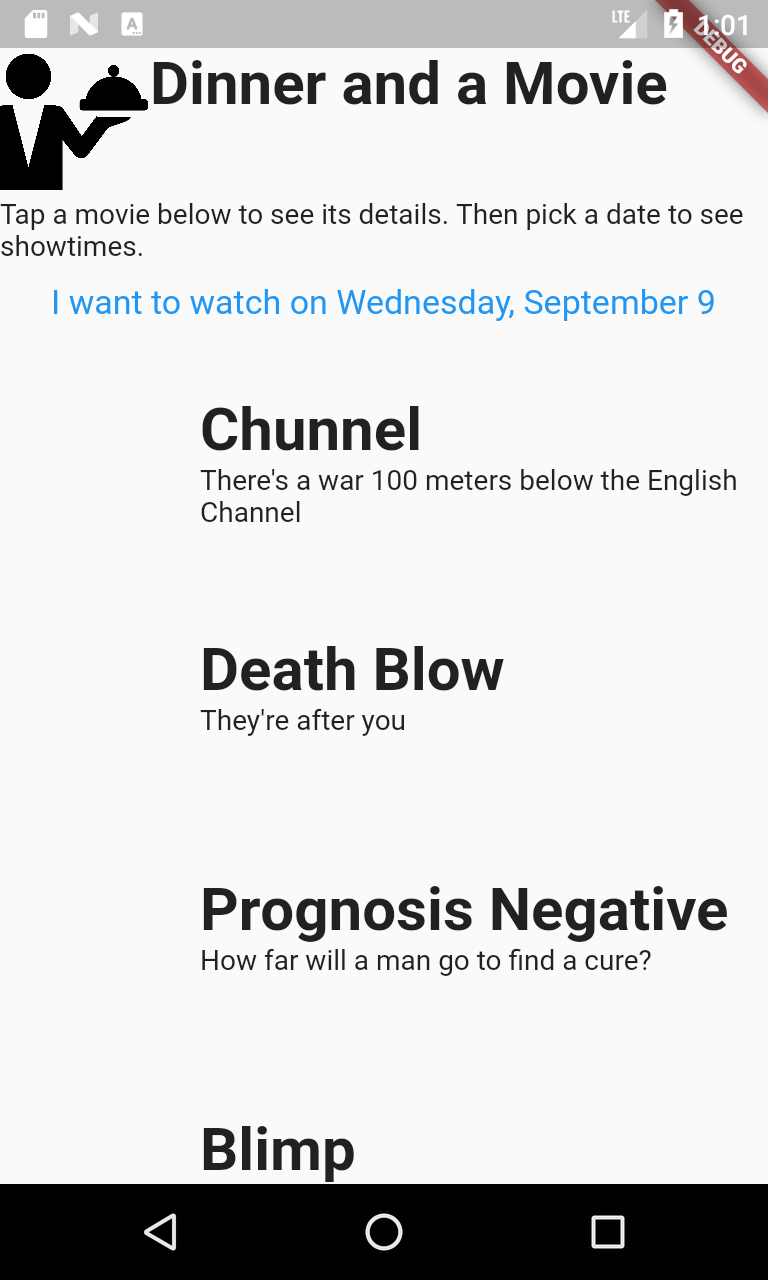
Dinner and a Movie
This is a very simple application that displays a list of movies for a selected date. When a movie is selected a dynamic page populated with a timetable and some metadata is shown. Although minimal, we are starting to see a few more pieces working together, such as network requests and simple user interactions.
Based on an existing Flutter and React Native comparison from Github, we added our very own Felgo version to compare all solutions.
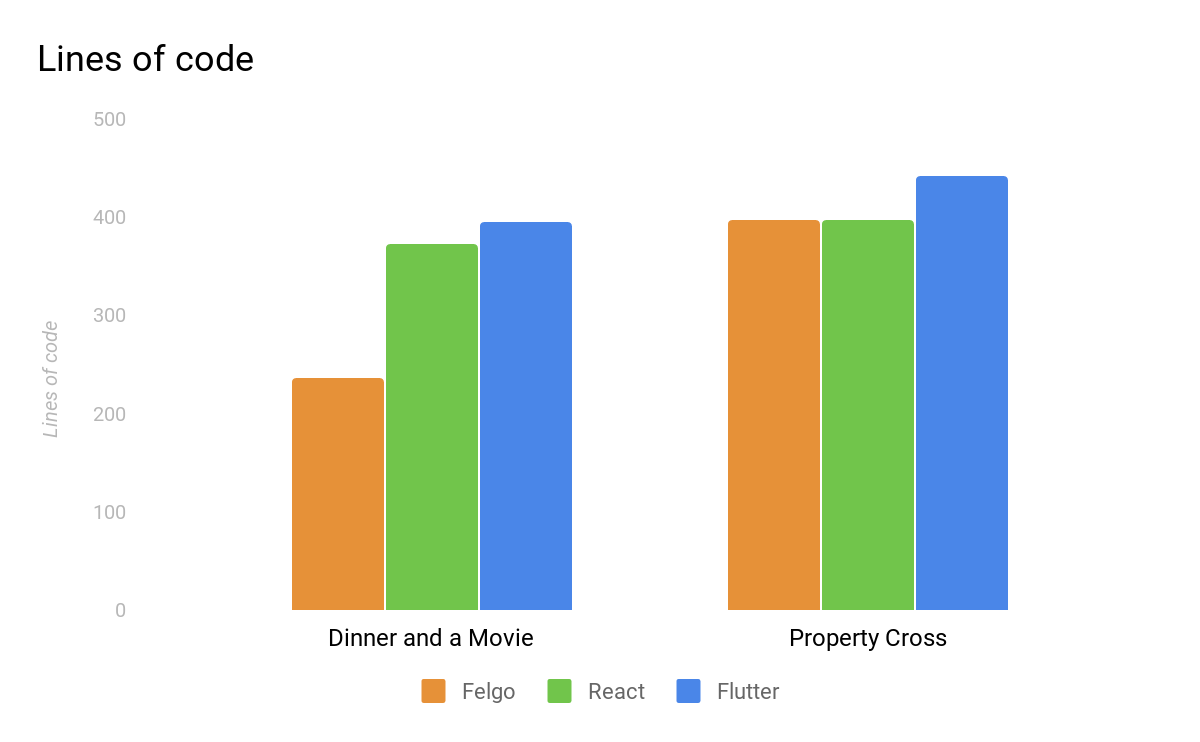
For a meaningful comparison of the required lines of code (LOC), we discard empty and comment lines. Felgo manages to squeeze the full application in about 236 lines of code, with React Native following at 372 and Flutter tailing at 396.
The Felgo implementation is generally more concise and you can get a glimpse of that by looking at all the previous examples. This is due to the more expressive API, which generally reduces boilerplate code.
Every implementation uses a completely custom UI with no native (or native looking) widgets. It looks the same with every framework. Here you can find a screenshot of the Felgo version, next to the Flutter one.
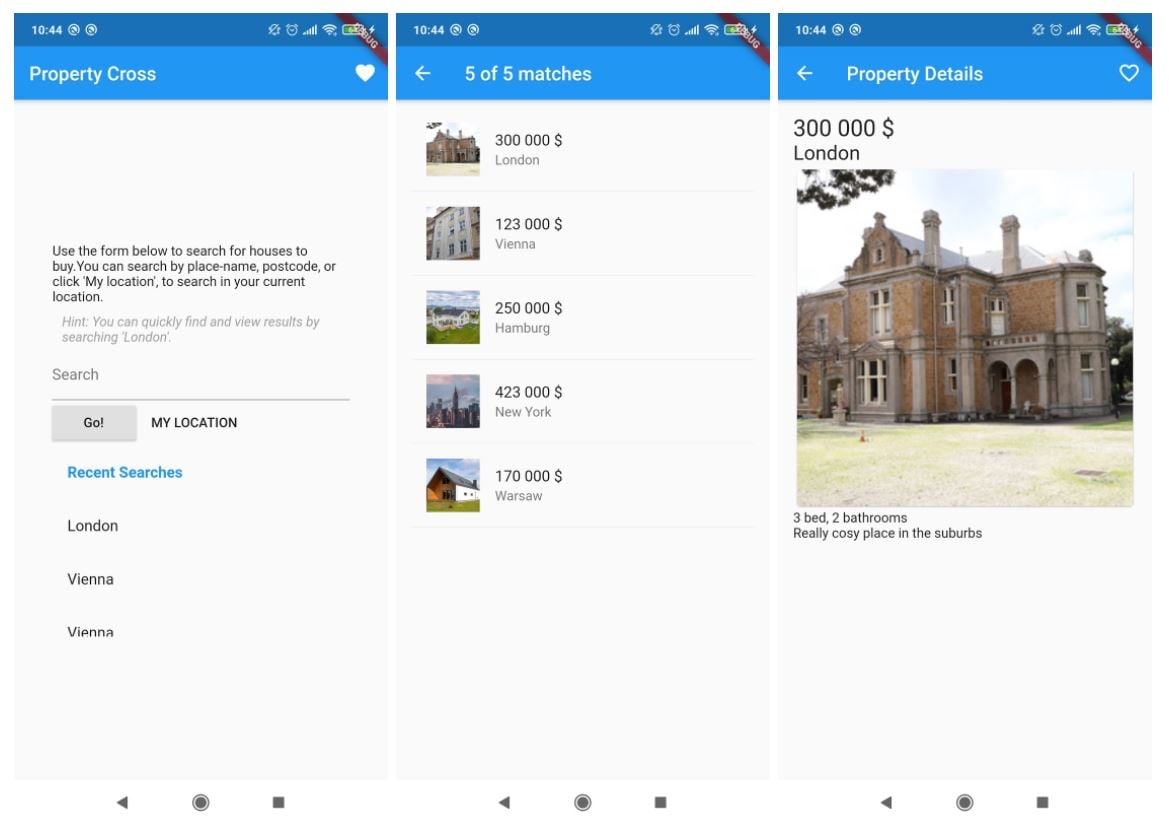
PropertyCross
For the PropertyCross app we went in the opposite direction. It is a sample bundled with the Felgo SDK, where a new implementation for Flutter and React Native was made for comparison.
The main screen allows searching for houses sold in a specific area, using a textual search or the current GPS location. The application then displays some demo search results in a list page. Clicking on any entry will bring up a detailed page with additional information for the property.
Let’s start and see how the final result looks like with each framework.
Flutter:
Felgo:
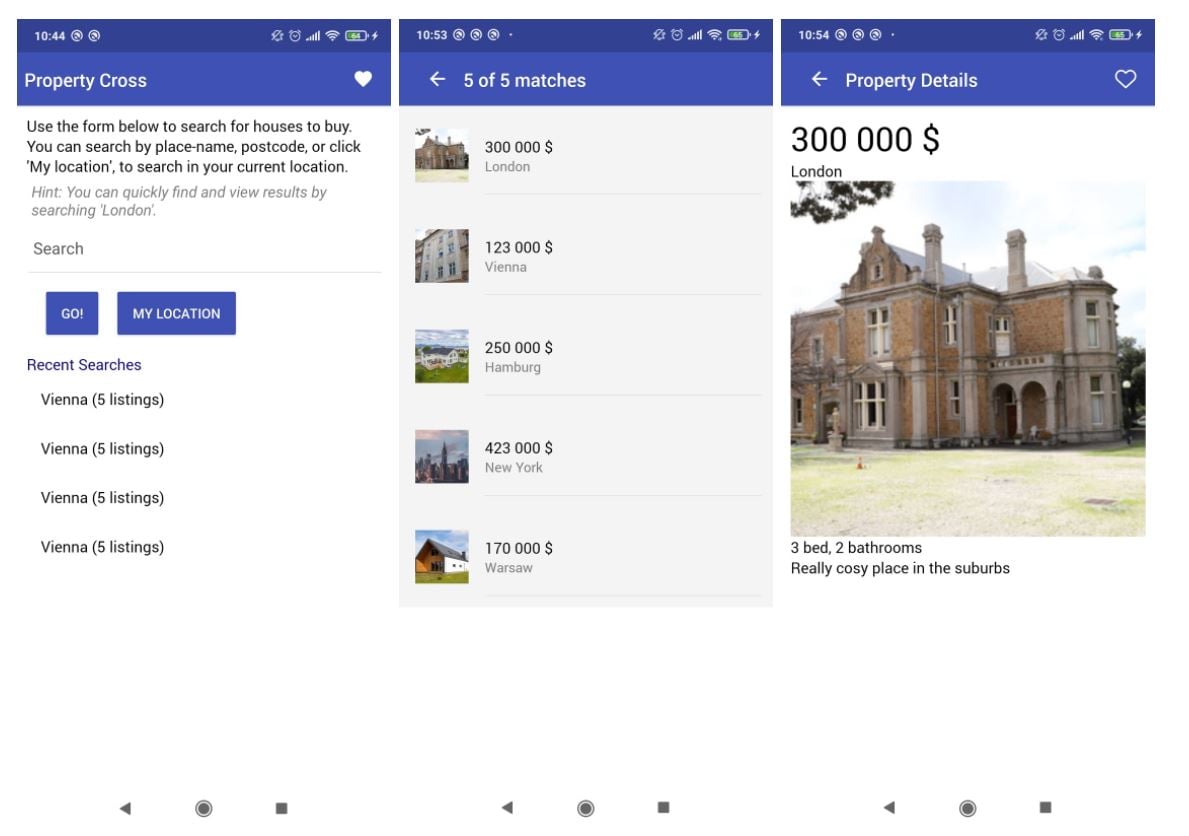
React Native:
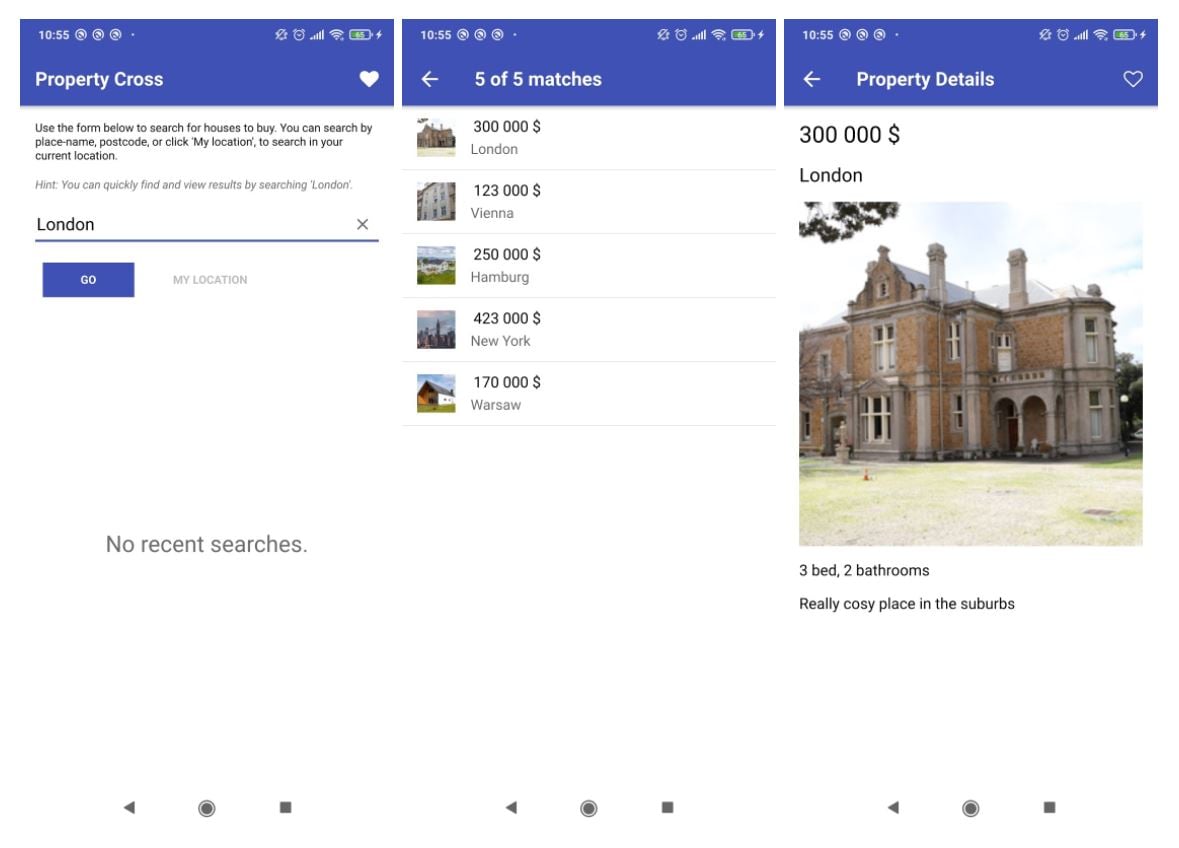
Every implementation looks like a native Android application!
To compare the code behind, we are going to focus on a part of it: displaying lists containing data retrieved from a server.
The mocked API returns a JSON object with some metadata related to each house:
{
 "response": {
   "application_response_code": "100",
   "page": 1,
   "total_results": 5,
   "listings": [
     {
       "id": 1,
       "center_lat": "51.209119",
       "center_long": "-0.489769",
       "long_title": "London, England",
       "place_name": "london_england",
       "title": "London",
       "thumb_url": "https://slsa-collections.s3.amazonaws.com/a2/49/1535-6206-5b10-b0a4-f34ba64c3163.jpg",
       "img_url": "https://slsa-collections.s3.amazonaws.com/a2/49/1535-6206-5b10-b0a4-f34ba64c3163.jpg",
       "img_width": 200,
       "img_height": 200,
       "price_formatted": "300 000 $",
       "bedroom_number": 3,
       "bathroom_number": 2,
       "summary": "Really cosy place in the suburbs"
     },
     {
       "id": 2,
       "center_lat": "51.739892",
       "center_long": "-1.052779",
       "long_title": "Vienna, Austria",
       "place_name": "vienna_austria",
       "title": "Vienna",
       "thumb_url": "https://www.hrs.com/en/media/image/2a/f6/45/PJ_Apartments-Krakau-Aussenansicht-522674_600x600.jpg",
       "img_url": "https://www.hrs.com/en/media/image/2a/f6/45/PJ_Apartments-Krakau-Aussenansicht-522674_600x600.jpg",
       "img_width": 200,
       "img_height": 200,
       "price_formatted": "123 000 $",
       "bedroom_number": 3,
       "bathroom_number": 2,
       "summary": "Really cosy place in the suburbs"
     },

     ...

}
We now want to show this data in a list with text, subtext and an image.
Creating a List with Felgo
Felgo performs network requests using the HttpRequest object:
HttpRequest.get(url)
  .then(function(res) {
    var content = res.text
    try {
      var obj = JSON.parse(content)
    } catch(ex) {
      console.error("Could not parse server response as JSON:", ex)
      return
    }
    console.debug("Successfully parsed JSON response")
    handleResult(obj) // Here we should handle the positive response
  })
  .catch(function(err) {
})
The response is fed to a JsonListModel which handles an efficient representation of the JavaScript data. The ListPage uses the JsonListModel to fill the view and instantiates a delegate for each element:
ListPage {
  model: JsonListModel {
    id: listModel
    source: obj // The resulting object form the sapi call
    fields: [ "title", "subtitle", "image"] // The json fields I’m interested in
    model: JsonListModel {
      id: listModel
      source: favorites ? dataModel.favoriteListings : dataModel.listings
      fields: [ "text", "detailText", "image", "model" ]
    }
    delegate: SimpleRow {
      item: listModel.get(index)
      text: item.title
      detailedText: item.subtitle
      imageSource: item.image
      onSelected: handleItemSelected()
    }
  }
}
Each entry of the listModel creates a SimpleRow instance and passes the relevant data fields. The expressiveness of QML mixed with Felgo components makes it really easy and concise.
Creating a List with Flutter
Network requests in Flutter look very similar:
http.get(uri).then((res) {
  data = json.decode(res.body);
  setState(() {
    _match_count = data["response"]["total_results"];
    for (var item in data["response"]["listings"]) {
      _items.add(item);
    }
    loadingPage = false;
  });
});
The state separation here is very evident, with items explicitly stored in the state object and the list built strictly from it.
http.get(uri).then((res) {
  Widget _buildList() {
  var listings = new List<Widget>();
  for (var item in _items) listings.add(_buildRow(item));
  if (loadingPage) listings.add(Center(child: CircularProgressIndicator()));
  return ListView(
    padding: const EdgeInsets.all(16.0),
    children: listings,
    controller: _scrollController,
  );
}

Widget _buildRow(Map<String, dynamic> element) {
  return Column(children: <Widget>[
    ListTile(
      leading: Image.network(element["image"].toString()),
      title: Text(element["title"].toString()),
      subtitle: Text(element["subtitle"].toString()),
      onTap: () {
        handleItemSelected();
      }),
    Divider(),
  ]);
}
The imperative approach here feels a little bit harder to read, but the code is still very concise.
Creating a List with React Native
Http requests in React Native are really as simple as they can be:
return fetch(url).then(res => res.json()).then(res => {
  // Update state with response
  this.setState({
    listings: this.state.listings.concat(res.response.listings),
    total_results: res.response.total_results,
    loading: false
  });
});
The setState call will invalidate the state requiring a sync with the underlying list, which is rendered via this method:
renderRow({item, index}) {
  return <ListItem key={index} onPress={() => handleClick() } thumbnail itemDivider>
    <Left>
      <Thumbnail square source=/>
    </Left>
    <Body>
      <Text>{item.price_formatted}</Text>
      <Text note numberOfLines={1}>{item.title}</Text>
    </Body>
  </ListItem>
}

render() {
  return <Container>
    <Header>
      <Button transparent onPress={this.navigateBack.bind(this)}><Icon name="arrow-back"/></Button>
      <Body>
        <Title>{this.state.listings.length} of {this.state.total_results} matches</Title>
      </Body>
      <Right>
        {this.state.loading &&
          <Spinner color='white'/>
        }
      </Right>
    </Header>
    <Content>
      <FlatList
        data={this.state.listings}
        renderItem={this.renderRow.bind(this)}
        onEndReached={this.endReached.bind(this)}
        onEndReachedThreshold={0.1}
        style=
        ListFooterComponent={this.state.loading && <Spinner color='darkblue'/>}
        ref={this.list}
      />

    </Content>
  </Container>
}
Counting the lines of code the Felgo and React Native implementations lead with respectively 397 and 398 lines of code. Flutter trails with 442 LOC.
We already stated that all three applications look native. But only on Android, which is not ideal, as material design definitely looks out of place on an Apple device. There will also be usability issues, as the beloved swipe-back gesture on iOS is missing with Android widgets. The React Native and Flutter versions require additional code to also provide an iOS styling.
The Felgo implementation is not only a hair shorter, but already offers a native look on Android, iOS and Desktop platforms. It also supports a responsive UI to work well on tablets or even Desktop. Let’s see how it looks on every platform at tablet size:
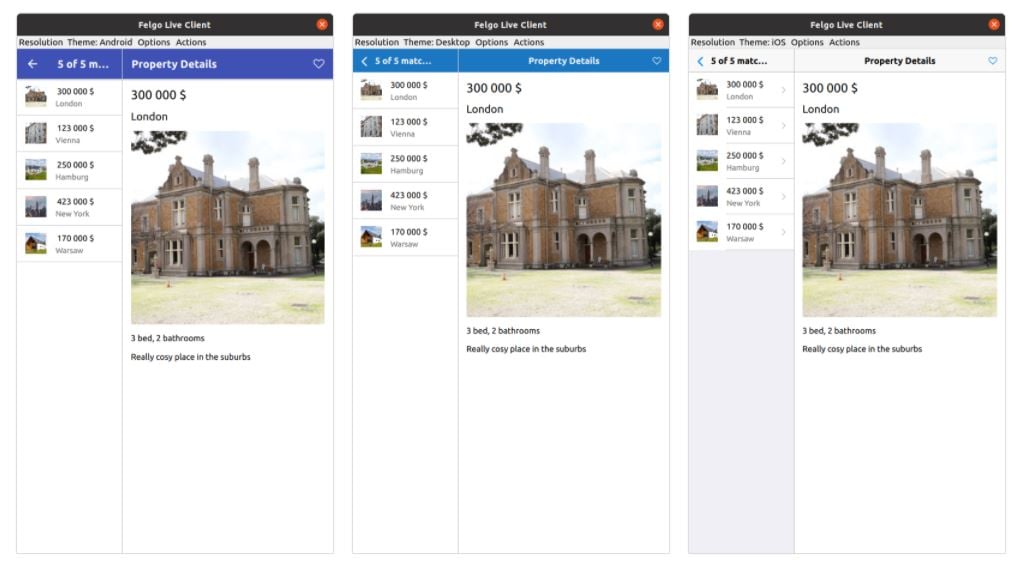
Implementing all these features to the Flutter and React Native versions will quickly add hundreds of lines of code, making Felgo even more efficient.
Conclusions
Comparing required code lines of Felgo vs Flutter, Felgo was the winner in both applications. In the Property Cross sample Felgo tied with React Native in terms of lines of code, but manages to look native on every platform and also directly supports a tablet layout.
Saving code is key to success. Less code is easier to maintain and has generally fewer bugs. Having an SDK that manually takes care of the styling and presentation of different platforms eases the burden for developers which can focus on improving the UX.
Differences between Native Rendering and Custom Rendering
The custom rendering of Flutter and Felgo is a radical departure from web-based solutions or products like React Native. Now it's time to go deeper into this topic to see how this affects your applications and their performance.
The core of each framework is the rendering engine, the piece of code that draws your widgets and animations on screen. Felgo and Flutter rely on custom-designed C++ engines to achieve the best performances. Instead, React Native uses native widgets to achieve the best platform consistency.
But what’s the difference to you, as a developer?
Native Rendering (React Native)
.png?width=630&name=Felgo.vs.Flutter.vs.ReactNative%20-%20Native%20Rendering%20(React%20Native).png)
Native rendering is the best choice to develop applications that look and feel as a part of the system.
When these solutions launched they were big improvements, as most cross-platform solutions were still web-based. But approaches like React Native have some disadvantages as well:
- Different platforms have different widgets. You have to duplicate parts of your UI code, to use respective platform widgets with their APIs. This again increases the costs of development and maintenance.
- User-interface styling is greatly limited by what the platform widgets provide. A fully customized UI for your brand is hard to achieve.
- Performance: whenever a change occurs it needs to travel through the JavaScript DOM layer, before reaching native widgets. This bridge creates a performance bottleneck that’s baked in the technology and thus impossible to avoid.
Custom Renderer (Flutter and Felgo)
.png?width=628&name=Felgo.vs.Flutter.vs.ReactNative%20-%20Custom%20Renderer%20(Flutter%2c%20Felgo).png)
Both Flutter and Felgo come with a custom renderer that is responsible for drawing your UI. The only communication with the native platform is for propagating user input or calling native APIs to e.g. use sensors or trigger system dialogs.
The highly optimized C++ renderer can directly draw anything with native performance. This allows greater levels of customization and faster performances. This approach is similar to most game engines on the market today.
Do you need custom Rendering?
The Flutter FAQ answers this question pretty well:
"You can choose to implement different app layouts for iOS and Android. Developers are free to check the mobile OS at runtime and render different layouts, though we find this practice to be rare.
More and more, we see mobile app layouts and designs evolving to be more brand-driven and unified across platforms. This implies a strong motivation to share layout and UI code across iOS and Android.
The brand identity and customization of the app’s aesthetic design is now becoming more important than strictly adhering to traditional platform aesthetics. For example, app designs often require custom fonts, colors, shapes, motion, and more in order to clearly convey their brand identity.
We also see common layout patterns deployed across iOS and Android. For example, the “bottom nav bar” pattern can now be naturally found across iOS and Android. There seems to be a convergence of design ideas across mobile platforms."
We can only fully agree with this! In today’s market, a branded, custom UI is the way to go.
To prove this, here is a collection of apps that got awarded with Design awards:

Custom rendering engines are amazing, as there’s no limitation to what your UI can do! Let’s take them for a spin and see how to introduce animations or graphical effects to your app.
Simple Animations
We are going to display a very simple fade animation with Felgo, Flutter and React Native. If you click on a button some text will slowly fade in and if you click again it will slowly fade out.
Felgo
Both Felgo and Flutter have the concept of explicit and implicit animations. The former are manually triggered and managed, while the latter get executed automatically whenever the state changes. In this example we’re going to try implicit animations:
import Felgo 3.0
import QtQuick 2.0

App {
  NavigationStack {
    Page {
      id: page
      title: "Page with animations"

      Column {
        anchors.centerIn: parent
        spacing: dp(10)

        AppButton {
          text: "Click me"
          onClicked: hiddenText.opacity = hiddenText.opacity > 0 ? 0 : 1
        }

        AppText {
          id: hiddenText
          text: "I slowly fade in"
          opacity: 0

          // Just this line, automatically animate changes
          Behavior on opacity { NumberAnimation { duration: 3000 } }
        }
      }
    }
  }
}
We can see that the animation is one line of code! When the opacity property changes, instead of setting the new value we are going to perform an animation, to interpolate from the current value to the final value within 3 seconds. On every rendered frame the view will receive the new value.
If the final value changes again before the running animation ends, the system just triggers a new animation from the current value to the new one. You are not required to manually handle such simple animations.
The application and the animation required just 26 lines of code.
Flutter
Flutter also has great animation support. Let’s see how to add the same simple implicit animation:
import 'package:flutter/material.dart';

void main() {
  runApp(MyApp());
}

class MyApp extends StatelessWidget {
// This widget is the root of your application.
  @override
  Widget build(BuildContext context) {
    return MaterialApp(
      title: 'Animation',
      home: MyHomePage(title: 'Page with Animations'),
    );
  }
}

class MyHomePage extends StatefulWidget {
  MyHomePage({Key key, this.title}) : super(key: key);

  final String title;

  @override
  _MyHomePageState createState() => _MyHomePageState();
}

class _MyHomePageState extends State<MyHomePage> {
  double opacityLevel = 0.0;

  @override
  Widget build(BuildContext context) {
    return Scaffold(
      appBar: AppBar(
        title: Text(widget.title),
      ),
      body: Center(
        child: Column(
          mainAxisAlignment: MainAxisAlignment.center,
          children: <Widget> [
            RaisedButton(
              child: Text(
                'Click me',
                style: TextStyle(color: Colors.blueAccent),
              ),
              onPressed: () => setState(() {
                opacityLevel = opacityLevel > 0 ? 0 : 1;
              }),
            ),
            AnimatedOpacity(
              duration: Duration(seconds: 3),
              opacity: opacityLevel,
              child: Text('I slowly fade in')
            )
          ]
        ),
      ),
    );
  }
}
The AnimatedOpacity will set up an interpolator to automatically update the value at each frame. It’s a bit more verbose at 51 lines of code, but still quite simple to achieve.
React Native
Animations are also supported in React Native. The View component changed to an Animated.View which supports fading in and out. As with the previous examples, the opacity value can be set using an interpolator.
import React, { Component } from 'react'

import {
 StyleSheet,
 TouchableOpacity,
 Text,
 View,
 Animated,
} from 'react-native'

class App extends Component {
 state = {
   currentOpacity: new Animated.Value(0),
   targetOpacity: 1
 }
 onPress = () => {
   var newTargetOpacity = this.state.targetOpacity > 0 ? 0 : 1
   this.setState({ targetOpacity: newTargetOpacity })
   Animated.timing(
     this.state.currentOpacity,
     { toValue: this.state.targetOpacity, duration: 2000 }
   ).start();
 }
 render() {
   return (
     <View>
       <text>Click me</text>
       <text>
         I slowly fade in!
       </text>
     </view>
   )
 }
}
const styles = StyleSheet.create({
 container: {
   flex: 1,
   justifyContent: 'center',
   alignItems: 'center',
 },
 button: {
   alignItems: 'center',
   backgroundColor: '#DDDDDD',
   padding: 10,
   marginBottom: 10
 }
})
export default App;

Can you spot the difference? Animations here are not implicit and automatically inferred by state changes. There is an explicit call to Animated.timing which performs the interpolation of values. Simple cases won’t be a problem, but you have to manage them as complexity grows. Code length is comparable to the Flutter implementation at 53 lines of code.
It seems like React Native animations require more care, but are Felgo and Flutter equally easy to use? The answer is: Yes. At least for basic and simple animation such as fading, color transitions, position animation, etc. But what if you want to walk the extra mile?
Graphical Effects and Shaders
With Qt and Felgo, you can do things that would be extremely complex and verbose in other frameworks. For example, each Item can be bound to a texture, and the texture can be loaded and drawn in a shader effect with just a few lines of QML. Some simple advanced graphical effects are already available in Qt through the QtGraphicalEffects module.
We are going to download an image from the network, load it into a texture then feed it to three components, each performing an animated effect:
import Felgo 3.0
import QtQuick 2.6
import QtGraphicalEffects 1.0

App {
  NavigationStack {
    FlickablePage {
      id: page
      title: "Page with animations"
      flickable.contentHeight: column.height
      property bool applyFilters: false

      AppImage {
        width: dp(300)
        height: dp(200)
        source: "https://picsum.photos/" + Math.floor(width)+ "/" + Math.floor(height)
        anchors.centerIn: image
        visible: false
        id: image
      }

      Column {
        id: column
        padding: dp(16)
        spacing: dp(16)
        anchors.centerIn: parent

        FastBlur {
          width: image.width
          height: image.height
          source: image
          radius: page.applyFilters ? 100 : 0
          Behavior on radius { NumberAnimation { duration: 2000 } }
        }

        Desaturate {
          width: image.width
          height: image.height
          source: image
          desaturation: page.applyFilters ? 1.0 : 0
          Behavior on desaturation { NumberAnimation { duration: 2000 } }
        }

        ShaderEffect {
          width: image.width;
          height: image.height
          // Qt will take care of transforming this into a uniform texture
          property variant src: image
          property color colorization: "#ff0000"
          property real animationBlend: page.applyFilters ? 1.0 : 0.0
          fragmentShader: "
            uniform sampler2D src;
            uniform lowp float animationBlend;
            uniform lowp vec4 colorization;
            uniform lowp float qt_Opacity;
            varying highp vec2 qt_TexCoord0;
            void main() {
              lowp vec4 tex = texture2D(src, qt_TexCoord0);
              gl_FragColor = vec4(tex * mix(vec4(1.0), colorization, animationBlend)) * qt_Opacity;
            }"

          Behavior on animationBlend { NumberAnimation { duration: 2000 } }

          SequentialAnimation on colorization {
            running: page.applyFilters
            ColorAnimation { from: "#ff6666"; to: "#66ff66"; duration: 2000 }
            ColorAnimation { from: "#66ff66"; to: "#6666ff"; duration: 2000 }
            ColorAnimation { from: "#6666ff"; to: "#ff6666"; duration: 2000 }
            loops: Animation.Infinite
          }
        }
      }

      MouseArea {
        anchors.fill: parent
        onClicked: page.applyFilters = !page.applyFilters
      }
    }
  }
}
The FastBlur type comes from QtGraphicalEffect and is used in the first example to slowly blur the image. A simple behavior with a NumberAnimation interpolates the radius property of the blur effect. All this in just 6 lines of code.
The second effect also comes from QtGraphicalEffect and will slowly desaturate the image until it becomes black and white. It uses a similar behavior and it also takes just 6 lines of code.
If you need more flexibility you can also directly use GLSL shaders, as shown in the third example with ShaderEffect. These are small programs that run on your GPU and allow very fast computations for graphical tasks. Input values are passed by the CPU in the form of uniforms, and the shader will use them to directly paint the output pixels. If you wish to do so, you can learn more about them on the qmlbook.
Achieving animations like these is generally very tedious and verbose, but the Framework takes care of everything. Properties are converted into uniforms and textures can be retrieved from any Qt Item.
When running the shader example you’ll see the colorized image changing for red to green to blue and back. The CPU computes the updated color at each frame using a sequential ColorAnimation. The GPU will take this value and will colorize the input image.
This complete animation application can be achieved in just 90 lines of code in Felgo.
Flutter doesn't expose an API to achieve comparable results. Developers have to get their hands dirty with raw OpenGL which will heavily increase the complexity of your application.
React Native provides an external WebGL based library called gl-rect, which exposes similar features. Given the nature of React Native though, the library can only add such features for new and custom components. You can not apply those effects to existing native widgets that are handled by the native renderer.
3D Rendering, Textures and More
Now we really want to go overboard. QML also supports 3D rendering and you have the ability to cross boundaries and render 2D objects in a 3D world or vice-versa.
We’re going to take the previous animated blurred image, render it in an animated offscreen texture and use it to texture a rotating cube.
import Felgo 3.0 import QtQuick 2.9 // Qt3D imports import Qt3D.Core 2.0 import Qt3D.Render 2.0 import Qt3D.Input 2.0 import Qt3D.Extras 2.0 import QtQuick.Scene2D 2.9 import QtQuick.Scene3D 2.0 import QtGraphicalEffects 1.0App { NavigationStack { Page { title: "Animated image cube" Scene3D { id: scene3d anchors.fill: parent focus: true aspects: ["input", "logic"] cameraAspectRatioMode: Scene3D.AutomaticAspectRatio
Entity { Camera { id: camera3D projectionType: CameraLens.PerspectiveProjection fieldOfView: 45 nearPlane : 0.1 farPlane : 1000.0 position: Qt.vector3d( 0.0, 0.0, 40.0 ) upVector: Qt.vector3d( 0.0, 1.0, 0.0 ) viewCenter: Qt.vector3d( 0.0, 0.0, 0.0 ) }
components: [ RenderSettings { activeFrameGraph: ForwardRenderer { camera: camera3D clearColor: "transparent" } }, InputSettings { } ]
TextureMaterial { id: material texture: offscreenTexture }
CuboidMesh { id: cubeMesh xExtent: 8 yExtent: 8 zExtent: 8 }
Transform { id: cubeTransform NumberAnimation on rotationX { from: 0; to: 360; duration: 40000; loops: Animation.Infinite } NumberAnimation on rotationY { from: 0; to: 360; duration: 35000; loops: Animation.Infinite } }
// This is the 3D cube we are displaying Entity { id: cube components: [ cubeMesh, material, cubeTransform ] }
// We render the Felgo component to an offscreen texture. Not drawn but usable from other components. Scene2D { id: qmlTexture output: RenderTargetOutput { attachmentPoint: RenderTargetOutput.Color0 texture: Texture2D { id: offscreenTexture width: 512 height: 512 format: Texture.RGBA8_UNorm generateMipMaps: true magnificationFilter: Texture.Linear minificationFilter: Texture.LinearMipMapLinear wrapMode { x: WrapMode.ClampToEdge y: WrapMode.ClampToEdge } } } entities: [ cube ] mouseEnabled: false
// The content consists of an image with the blurring effect. AppImage { width: 512 height: 512 source: "https://picsum.photos/512/512" anchors.centerIn: image visible: false id: image }
FastBlur { width: image.width height: image.height source: image radius: 0 // Animation on the blurring effect SequentialAnimation on radius { NumberAnimation { from: 0; to: 100; duration: 3000 } NumberAnimation { from: 100; to: 0; duration: 3000 } loops: Animation.Infinite } } } } } } } }
The Scene2D wraps the Item we wish to use as texture with the applied FastBlur effect. We also apply a SequentialAnimation to blur the image back and forth. This image is then passed to the TextureMaterial object, which is part of the entity cube we are drawing. The 3D Cube rotation is done with a NumberAnimation on its x and y rotation properties.
If you used OpenGL in the past you are probably crying right now, as this is taking only around 100 lines of QML code.
Key Questions for Choosing a Framework
We’ve seen a lot of examples and how the different Frameworks operate under the hood. It’s now time to ask yourself some questions, so you can pick the best tool for the job.
- Do you have an existing codebase you would like to reuse?
If so, choose a technology that allows you to reuse your code. Specifically, the tool needs to support the same programming language that your existing codebase is written in. With Felgo and Flutter you can also mix native code with cross-platform views. This is a good approach if you want to migrate an existing native application to cross-platform step by step. - Is your development team already familiar with a certain technology?
If so, you will have a harder time learning another tool from scratch. If outsourcing is an option, you can also take advantage of development services or external teams that already have that knowledge. Qt/QML has a big community, and Felgo offers training sessions, workshops and development services to get your project started. React Native enjoys a large community as well, so it will be easy to find experienced developers. Flutter on the other hand is quite new and less established.
- Do you need absolute consistency with your OS or do you favor flexibility and customized UI?
The answer to this question can tilt your decision towards or away from purely native development. React Native is somewhere in the middle: you can share some code compared to purely native development, while still using native rendering and native widgets. Felgo has a big library of controls that look native on both iOS and Android, while also allowing a fully custom UI. Flutter can support both platform styles as well, but needs some extra code to do so. But in contrast to React Native, you don’t get real native widgets in these systems. On the other hand, the custom renderer of Felgo and Flutter is a big advantage for creating branded UIs or using advanced animations and effects.
- Do you want your application to be the most efficient and optimized for each platform, regardless of the time & cost?
Then go native and develop your own app for every platform you need. You will also have direct access to all the latest platform features and widgets, without relying on a cross-platform solution to make such things available in a cross-platform way. As there is no shared code the development costs will skyrocket though. To provide the best value with the available budget a cross-platform solution is usually the better choice.
- Do you also have other target platforms like Desktop or Embedded?
Then Felgo definitely has the edge! As it builds upon Qt, you can easily cross-compile your app to any kind of platform.
Conclusion: Flutter vs React Native vs Felgo
It is not enough to compare these cross-platform frameworks at a high-level. There are many important topics to discuss in detail, which can shift what’s best for your project. For example, the three frameworks offer different features and languages, have a certain way of handling the state and rely on either a native or custom rendering approach. To see how coding looks like in the end, we started with some simple applications and later compared the implementation of full real-world examples. As a glimpse of what’s possible and where the limits are, we also covered some simple animations and analyzed how to build more complex ones.
After discussing all these topics, let’s summarize the main takeaway of the comparison:
- Only Felgo can run on every platform, operating system, screen density and screen size with no additional effort. This also includes desktop platforms, embedded systems and the web.
- With applications favoring brand identity over system integration, the customizability and performances of custom renderers are generally favorable. With Felgo you use a fast custom renderer, but are also able to render native-looking widgets on every platform.
- For animations, Felgo was both much more flexible, and much easier. React and Flutter are sufficient for simple animations, but nothing can beat QML as complexity increases.
- The Felgo implementation has been the shortest one in every single example. This holds for the simple app examples as well as the real-world ones. Also, keep in mind that Flutter and React require additional code to achieve a native look for multiple platforms.
If we look at the total lines of code across all the examples that this comparison covered, React Native requires 28% more code, and Flutter comes in last with 40% overhead compared to Felgo:
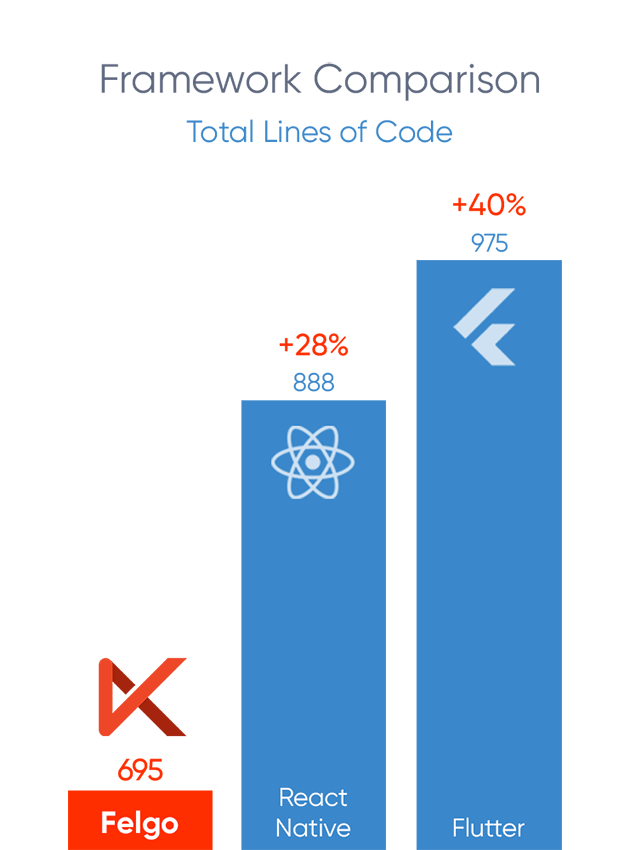
We already stressed how having a smaller codebase will reduce the number of bugs and increase the quality of your application. Felgo helps to reduce boilerplate and menial work. You’ll be able to do more with less code and less time. Your application will be on the market sooner, it will be easier to maintain and it will look and feel great on many different platforms. If you are not convinced, just sign-up for free and try it yourself!
You can find the source code of all the examples on GitHub.

Related Articles
Ionic & Felgo: App Development Framework Comparison
Qt vs. HTML5 for Cross-Platform App Development in 2020
3 Practical App Development Video Tutorials
Most Popular Programming Languages
Related Videos:
Amazing UI with Felgo Controls, APIs and Qt3D on Embedded Linux
More Posts Like This
.jpg?width=705&name=qml-hot-reload-with-felgo-live-for-qt%20(1).jpg)

Best Practices of Qt on Mobile