
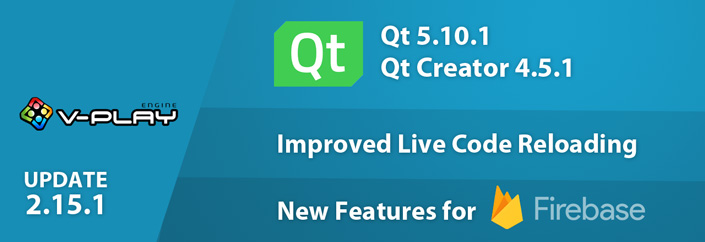
Felgo 2.16.0 adds support for devices with notches like iPhone X. This allows to create mobile apps or games that look good on all modern devices and screens. With this update you can also change the screen orientation of your app at runtime. Felgo 2.16.0 comes with many improvements and fixes and is free to use.
Why You Should Update Your iOS App to Support iPhone X
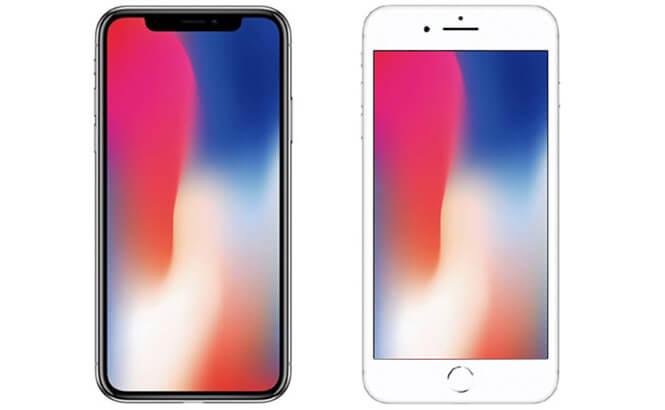
The iPhone X features a big edge-to-edge display with a notch for the front camera and speaker. Also, hardware buttons at the front no longer exist. They got replaced by on-screen buttons and gestures provided by the OS.
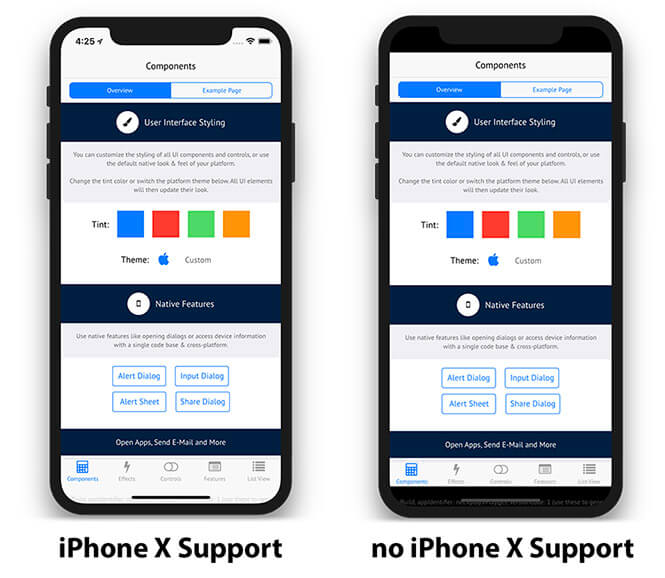
Your existing iOS apps will come with black borders to not overlay areas with a notch or screen gestures:
To fully support iPhone X and let your app fill the whole screen, you can add an additional launch image for the iPhone X resolution. You should add one image with 2436 x 1125 pixels for landscape mode, and one with 1125 x 2436 pixels for portrait.
Note: The updated Felgo project wizards already come with the right configuration and images. You can create a new project and have a look how the asset catalog is set up.
However, if your app now covers the full screen of the iPhone X, some parts are covered or not accessible:
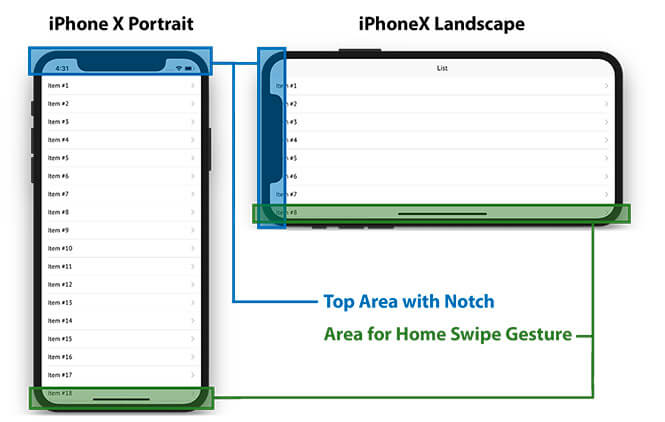
The notch covers the top navigation bar in portrait mode and your page content in landscape mode. For both orientations, the area for the home swipe gesture overlaps your app at the bottom. Also note that the new screen comes with rounded corners.
To solve this problem, your app must know about the safe area of the screen. It is the part of your app, which is not covered by the notch or on-screen gestures:
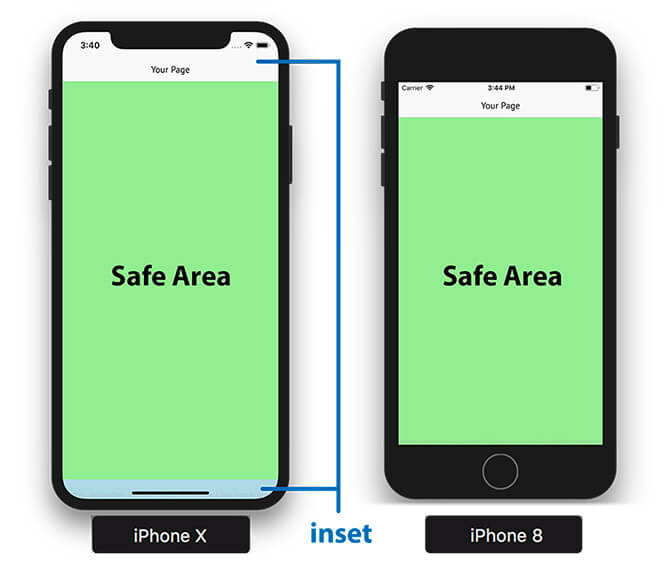
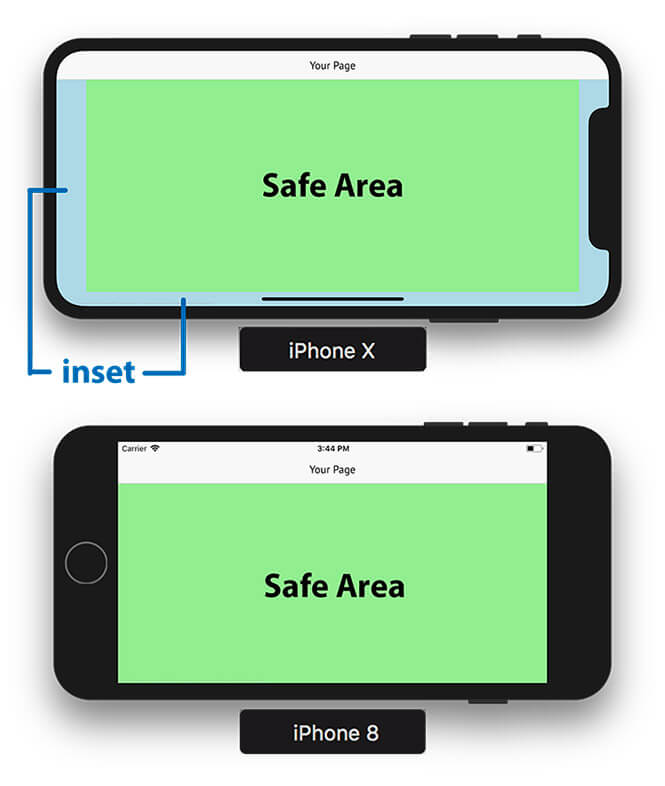
For example, the top navigation bar requires more space on iPhone X when in portrait mode. In landscape mode it looks a bit different. Your app UI then requires margins to the left and right, as well as a small inset at the bottom:
How to Create iPhone X Apps with Felgo
Felgo Apps Support for Display Notches and Safe Area
The latest Felgo update 2.16.0 adds support for iPhone X and screens with notches. With Felgo, you do not require any extra code to let your app look good on iPhone X. With only a few lines of code, it is possible to create native iOS apps that look good on every device:
import Felgo 3.0
import QtQuick 2.0

App {
 // adds tab navigation
 Navigation {

   // first tab
   NavigationItem {
     icon: IconType.home
     title: "Main"

     // main page
     NavigationStack {
       Page {
         title: "Main"

         Rectangle {
           anchors.fill: parent // Rectangle fills whole Page
           color: "lightgreen"

           AppText {
             anchors.centerIn: parent // AppText is centered on Page
             text: "Safe Area"
           }
         }
       }
     }
   }

   // second tab
   NavigationItem {
     icon: IconType.gears
     title: "Settings"

     // settings page
     NavigationStack {
       Page { title: "Settings" }
     }
   }

 }
}
This is how the above example app looks like on an iPhone X:
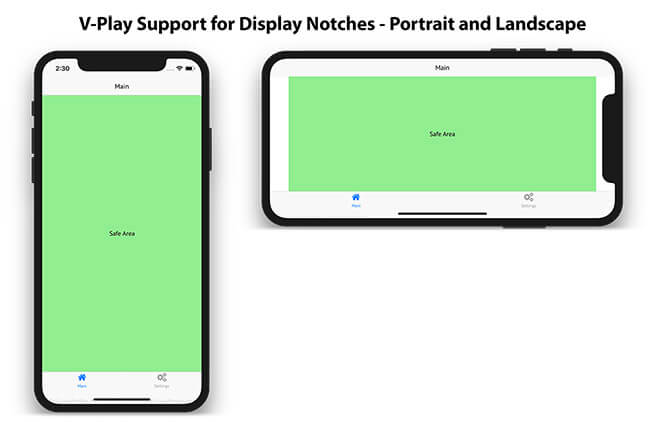
Felgo components like Navigation and NavigationStack automatically support the safe area. They include extra margins for the tab bar and navigation bar if required. Your Felgo app will look good out of the box when using these components. The Page content also auto-aligns with the safe area of the screen. For devices without notches, your app will not show any extra margins or insets.
Optimize Your App UI for iPhone X
For most use cases, the default settings are fine to let your app look good on devices with and without a notch. If you want more control over how to display your content, you can disable the useSafeArea setting of each Page. You then have two options to work with the safe area:
- Configure certain content items within the Page to align with the safe area.
- Retrieve the actual safe area inset of the screen and layout items as required.
The following example deactivates the useSafeArea setting and shows both approaches:
import Felgo 3.0
import QtQuick 2.0

App {

 Page {
   useSafeArea: false // the page content can use all available space

   // fill whole page/screen with blue color (background)
   Rectangle {
     anchors.fill: parent
     color: "lightblue"
   }

   // fill only safe area with green color (content)
   Rectangle {
     anchors.fill: parent.safeArea
     color: "lightgreen"
   }

   // adaptive background to cover top inset area (or status bar area on devices without insets)
   Rectangle {
     width: parent.width
     height: nativeUtils.safeAreaInsets.top > 0 ? nativeUtils.safeAreaInsets.top : nativeUtils.statusBarHeight()
     color: "yellow"
   }
 }

}
Running this app on an iPhone X produces this result:
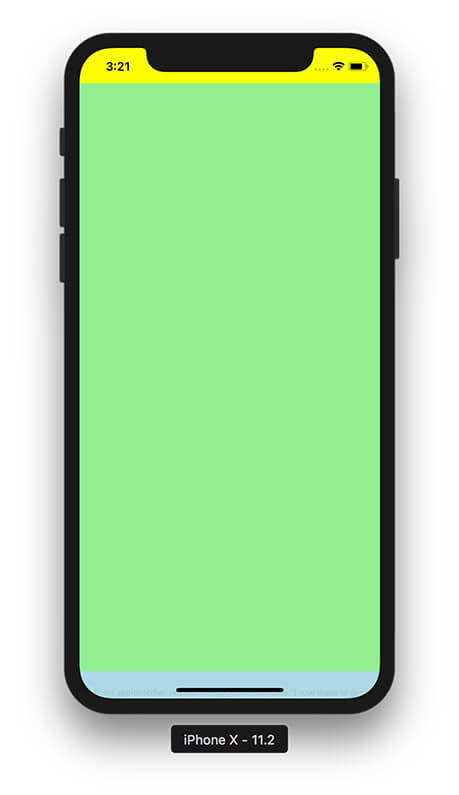
The Page content can now cover the full screen by default. You can use the safeArea property of the Page to align items with the safe area of the screen. The above example uses this property to fill the safe area with a green rectangle. This is where you can place your content items.
The nativeUtils.safeAreaInsets hold the actual safe area inset of the screen in pixels. Devices without notches do not have any insets and thus return 0. For iPhone X, the yellow rectangle will cover the top inset, which includes the status bar. The height is set to match the status bar if no inset is returned by nativeUtils.safeAreaInsets.top. With this simple switch it is possible to still support older devices.
The available safeAreaInsets properties are:
- nativeUtils.safeAreaInsets.top
- nativeUtils.safeAreaInsets.right
- nativeUtils.safeAreaInsets.bottom
- nativeUtils.safeAreaInsets.left
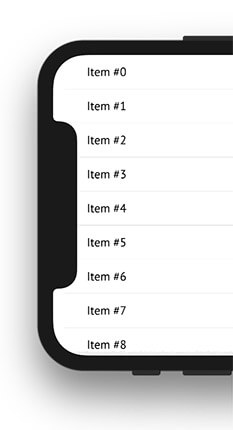
Developing adaptive user interfaces this way is very convenient. The following example shows how you could use nativeUtils.safeAreaInsets.left to add more indent for the cells of a list.
import Felgo 3.0
import QtQuick 2.0

App {

 ListPage {
   useSafeArea: false // the page fills all available space
   model: 50 // quick way to populate the list with 50 items

   // UI for cells of the list
   delegate: SimpleRow {
     text: "Item #"+index

     // set indent of the cells
     // matches the safe area inset or minimum 16 dp (if no inset required, e.g. in portrait mode or on older devices)
     style.indent: Math.max(nativeUtils.safeAreaInsets.left, dp(16))
   }
 }

}
With such simple additions, you can make sure that your app looks perfect on screens with and without safe area insets.
You don’t need to add such tweaks for regular apps that offer the standard iOS UI with a navigation bar and tab bar. The Felgo page and navigation components look good on all devices and adapt their style automatically.
iPhone X Support for Felgo Games
Prepare Your Games for Displays with Notches
If not taken into consideration, the iPhone X notch or home gesture area can heavily affect the user experience of your game. Let’s say your game uses the bottom screen area to show some touch input controls. The iPhone X does not own a home button, so it uses a small area at the bottom for native touch gestures.
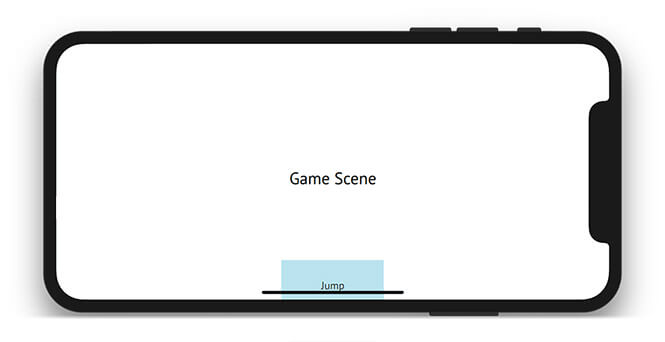
Your input controls thus become inaccessible, and your game essentially not playable. You do not want to show such critical game elements in parts of the screen that are not safe.
How to Use the Safe Area in Your Game Scenes
With iPhone X Support for Felgo Games, your game is kept within the safe area out-of-the-box. You can rely on the GameWindow and Scene components to only use the safe area on displays with notches.
import Felgo 3.0
import QtQuick 2.0

GameWindow {
 id: gameWindow

 Scene {
   id: scene

   // fills the full screen
   Rectangle {
     anchors.fill: parent.fullWindowAnchorItem
     color: "lightblue"
   }

   // fills the safe area
   Rectangle {
     anchors.fill: parent.gameWindowAnchorItem
     color: "lightgreen"
   }

   // fills the scene
   Rectangle {
     id: rectangle
     anchors.fill: parent
     color: "lightyellow"

     Text {
       text: "Scene"
       anchors.centerIn: parent
     }
   }

 }
}
The Scene::gameWindowAnchorItem only covers the safe area on devices like iPhone X. With the new Scene::fullWindowAnchorItem, you can choose to use the full screen for some UI elements of your game Scene. The above example covers the full screen with a blue background, but keeps other game elements safe:
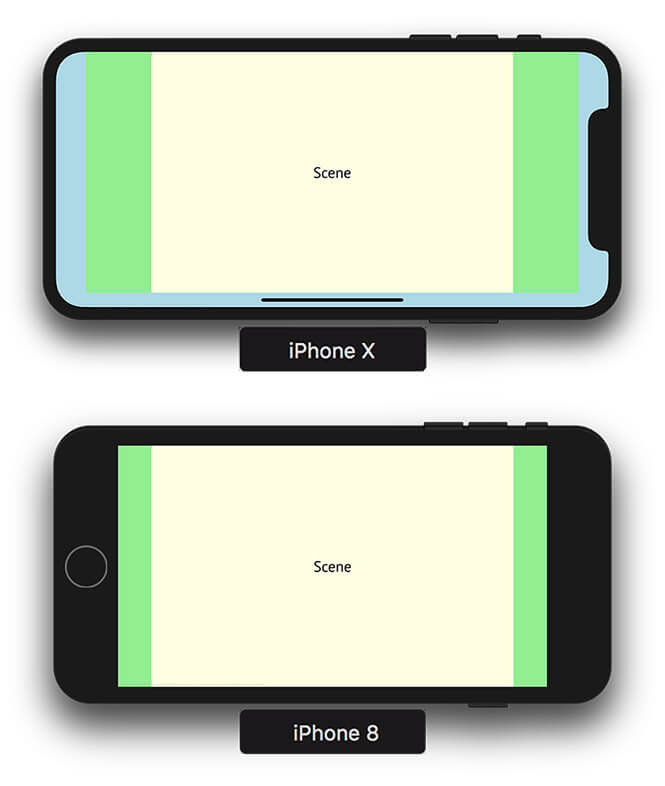
The Scene scaling mechanism resizes the Scene to match the game window, which reflects the safe area. To let your game scene fill the whole screen, it is possible to deactivate the Scene::useSafeArea setting:
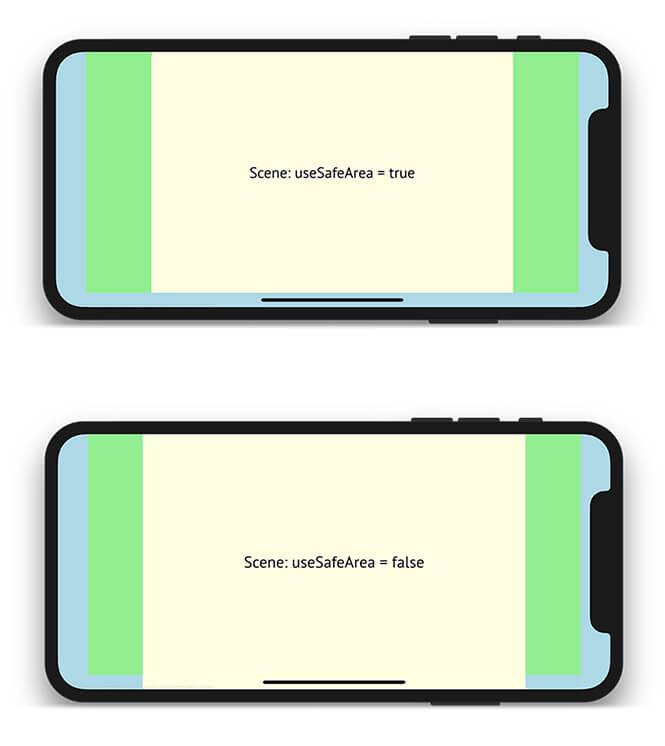
To retrieve exact pixel insets of the safe area, you can use the NativeUtils::safeAreaInsets property.
With the default setup, most Felgo games will work fine on iPhone X with few simple additions. For example, to let your background image cover the scene’s fullWindowAnchorItem instead of the game window.
To make your background image big enough to fill the screen of iPhone X, the following sizes are suggested:
| Image type | Unmodified Scene size (3:2 ratio) | Suggested Background Size |
| sd | 480 x 320 | 694 x 360 |
| hd | 960 x 640 | 1388 x 720 |
| hd2 | 1920 x 1280 | 2776 x 1440 |
You can find a Photoshop template with the suggested background size here.
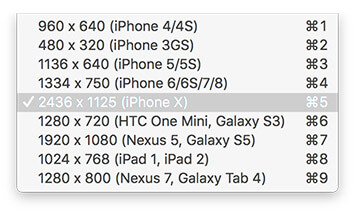
Simulate iPhone X on Desktop
The addition of iPhone X support also brings a new entry to the resolution simulator on Desktop.
The desktop simulation for iPhone X does not only include the correct resolution, it also covers the safe area insets:
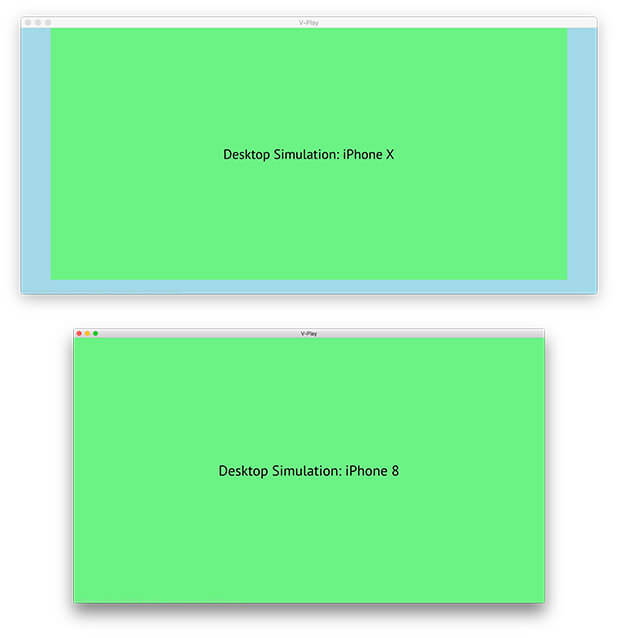
This is a huge time-saver when developing for iPhone X. You can test how your UI looks on Desktop and switch resolutions at runtime. No need to deploy your app to different physical or virtual devices.
Set Screen Orientation At Runtime
You can now set the preferred screen orientation at runtime from within your QML code!
To specify the global orientation you can use the new property NativeUtils::preferredScreenOrientation. E.g. to lock and unlock your app or game to portrait orientation, you can use the following lines of code:
import Felgo 3.0
import QtQuick 2.0

App {

 Column {
   AppButton {
     text: "Lock to portrait"
     onClicked: nativeUtils.preferredScreenOrientation = NativeUtils.ScreenOrientationPortrait
   }
   AppButton {
     text: "Reset default orientation"

     // Resets to the orientation defined in AndroidManifest.xml / Project-Info.plist
     onClicked: nativeUtils.preferredScreenOrientation = NativeUtils.ScreenOrientationDefault
   }
 }

}
You can also specify the orientation per page in apps, using Page::preferredScreenOrientation. Use this example code to show a page fixed to portrait mode:
import Felgo 3.0
import QtQuick 2.0

App {
 id: app

 NavigationStack {
   id: stack

   Page {
     id: page
     title: "Screen orientation test"

     AppButton {
       text: "Push portrait page"
       onClicked: stack.push(portraitPage)
     }
   }
 }

 Component {
   id: portraitPage

   Page {
     id: page
     title: "Portrait page"
     preferredScreenOrientation: NativeUtils.ScreenOrientationPortrait
   }
 }
}
These properties only have an effect on iOS and Android and override the default screen orientation defined in your project’s Project-Info.plist and AndroidManifest.xml.
New Felgo Live Server for Live Code Reloading
The new Felgo Live Server offers an improved user interface and new features.
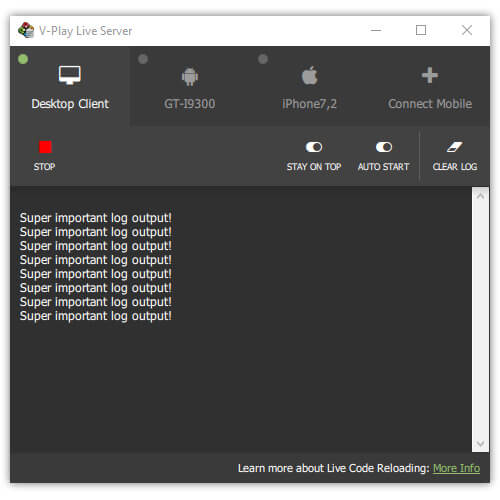
With the new AUTO START option, you can disable the desktop client from launching automatically. This is handy if you switch between your projects often, or only want to test your project on mobile.
You can now also clear the log output of each client individually.
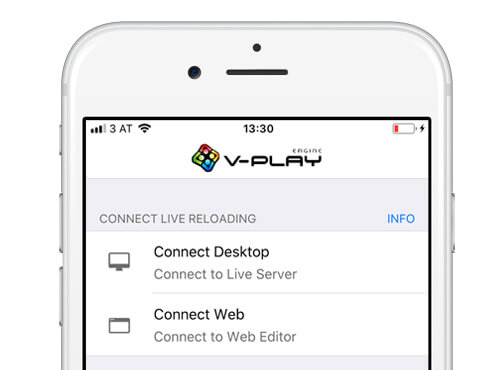
Connect and Remove Mobile Clients
To connect your mobile device, you only need to download the Felgo Live Scripting app for Android or iOS, and click on Connect Desktop.
The Live Server will then show a pending connection request, like this:
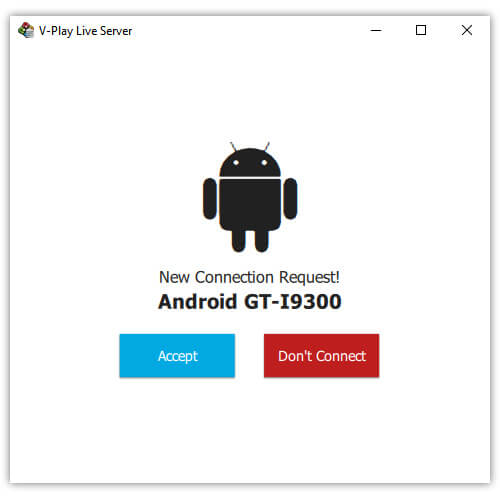
If you select Accept, your mobile device will be connected. The Live Server will memorize your device. The next time you connect, the request is accepted automatically.
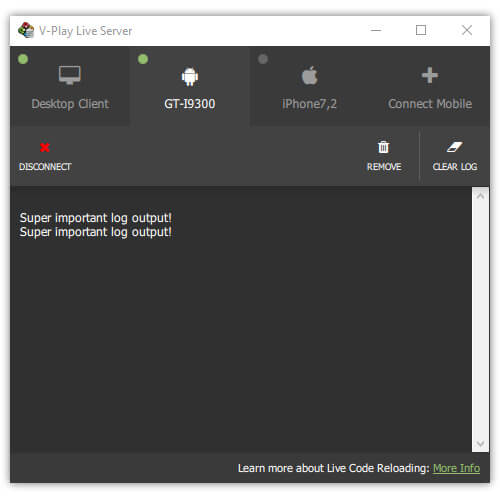
If you want to remove your device completely, select the REMOVE option in the Live Server:
Starting the Live Server the for First Time
The first time you start the Live Server, you will see a new welcome screen.

If you want to connect any mobile device on Windows, it is very important to allow the Live Server to communicate through your firewall. Your project is transferred over a point-to-point connection between the Live Server and the Live Client. It does not leave your local network.
Update your Felgo Live Scripting App
If you already installed the Felgo Live Scripting app, it is very important to update the app to the latest version. This version of the Live Server uses a different protocol, and is only compatible with the latest version of the Live Scripting app.
We usually recommend to use the latest version of the app anyway, to have access to the latest features. This time, it is mandatory.
More New Features in Felgo 2.16.0
Felgo 2.16.0 includes many more features and fixes like:
- With NavigationItem::showInDrawer you can now hide single navigation entries from the drawer menu.
- The screen diameter threshold for App::tablet and GameWindow::tablet detection increased to 6.7 inches. The property now returns false for phablets and phones with bigger screens like the iPhone X or Samsung Galaxy S8+.
- NativeUtils can now be used with import Felgo 3.0 only (you don’t need to add import Felgo 3.0 anymore to access native features).
- Disable navigation from the leaderboard to user profiles by setting SocialView::leaderboardProfileEnabled to false.
- Choose whether to show the friends section for your leaderboard with the SocialView::leaderboardShowFriends property.
- You can now globally disable ELO-based match-making for VPlayMultiplayer by setting VPlayMultiplayer::useRankingBasedMatchmaking to false.
- You can now replace the contentItem of AppTabButton with custom QML code, which threw an error before.
- Solved performance issues with AnimatedSpriteVPlay and TexturePackerAnimatedSpriteVPlay on Windows.
- Fixed bug in VPlayGameNetwork where the user’s selected country sometimes got reset on app restart.
- NativeUtils::displayCameraPicker() now also supports targeting Android 7.0 and newer. Due to changes in the Android rules for app interaction, if your app uses a targetSdkVersion >= 24 in AndroidManifest.xml, it needs to use a content provider so the camera app can save the image to the app. For new projects created in Qt Creator, everything is already configured properly. If you have an existing project and are updating targetSdkVersion to 23 or greater, follow this tutorial.
- The default AppButton::radius setting now applies App::dp() for the chosen ThemeAppButton::radius. Similar to other button settings, the border radius is therefore density independent from now on.
- The VPlayMultiplayer::playerLeft() signal now triggers correctly when a player leaves the game.
- Fix support for OneSignal push notifications on Android 8.0 devices.
Be sure to update to the latest version. For a complete list of the changes, please check out our change log!
How to Update Felgo
Test out these new features by following these steps:
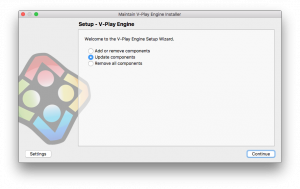
- Open the Felgo SDK Maintenance Tool in your Felgo SDK directory.
- Choose “Update components” and finish the update process to get this release as described in the Felgo Update Guide.
If you haven’t installed Felgo yet, you can do so now with the latest installer from here. Now you can explore all of the new features included in this release!
For a full list of improvements and fixes to Felgo in this update, please check out the change log!
More Posts Like This
How to Make Cross-Platform Mobile Apps with Qt – Felgo Apps
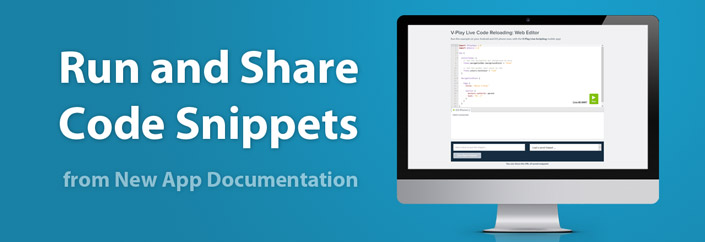
New Mobile App Development Documentation with QML Live Reloading of Code Snippets


