Computers have evolved with time and now we can find them in places that are hard to believe. In our refrigerator, our TV, our WiFi Router, or even in our car. Embedded systems now manage to use computers in many creative and ingenious ways.
With this evolution, many hardware vendors start to produce mini-computers with limited memory, CPU, and storage resources. They can be embedded in such small machines, and there are many options available in the market. In this post, we are going to introduce you to the top 6:
What to Consider when Developing on Embedded Computers?
What is an Embedded Computer?
Embedded computers are used in embedded systems with very limited resources. We can’t use the same kind of programming we use on the desktop or the web. There are some important differences when creating applications for these systems:
The first thing that you need to take into consideration is memory limitations. It directly leads us to the main programming languages for embedded development: C and C++. The ability to precisely manage the memory and other resources are essential for this type of system.
The second thing is how to compile our software. For embedded systems, you need to configure a unique toolchain. It must target the embedded operating system and the board that you are going to use.
Finally, you have to consider the dependencies and how to link them to your project. You need to think if you are going to statically link the libraries needed, or if you are going to build them with the OS image to link them dynamically.
Embedded Hardware: Boards, Development Kits and Operating Systems
Around forums, chats, or social networks you can hear about systems like Arduino, Raspberry Pi, or Beagleboard. They are micro-computers that come with a CPU or an MCU, and a limited amount of memory and storage capacity. To communicate, these computers usually offer USB ports, an Ethernet port (or WiFi support), Audio Input/Output, and a Video Output.
You can create all kinds of embedded systems with these boards. They are used within small devices that fulfill a unique purpose. For example, a robot that cleans your house or the computer in charge of reading all the sensors in your car.
But to create your own device, you need more than a board. You also have to consider which programming language and integrated development environment (IDE) the board supports and what operating system is available for it. This post will show you the options each board offers to create embedded applications.
Examples of Embedded Systems
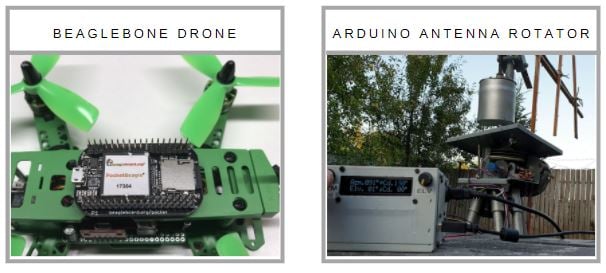

A lot of projects use these boards. For example, you can install embedded hardware to rotate an antenna or use embedded computers in drones, robots, or weather stations. As a consumer, you will often see them being used by startups and hobbyists. But of course, you can also find them in aerospace projects, industrial robots or even in your car.
1. Arduino
Arduino is “an open-source hardware and software ecosystem” launched in 2005 in Italy. It is the first open-source hardware project to reach worldwide spread and one of the most used to create embedded projects.
Arduino includes a group of boards, an IDE, a set of instructions (Arduino language) and a collection of libraries, which makes the control of electronic parts really friendly.
Embedded Software Examples for Arduino
Arduino is mainly used by hobbyists and professionals around the world for many types of projects. If you search on the internet, the amount of tutorial and DIY projects you will find is overwhelming; robots, door control systems, instruments, light dimmers, IoT devices, almost anything that requires to control electronics can be done with Arduino.
One of the places you can find cool projects of all nature is the Arduino Project Hub. Another source for project examples and ideas is Instructables. On this site, the community uploads their projects and how they did them.
Arduino - Embedded Computer Specifications
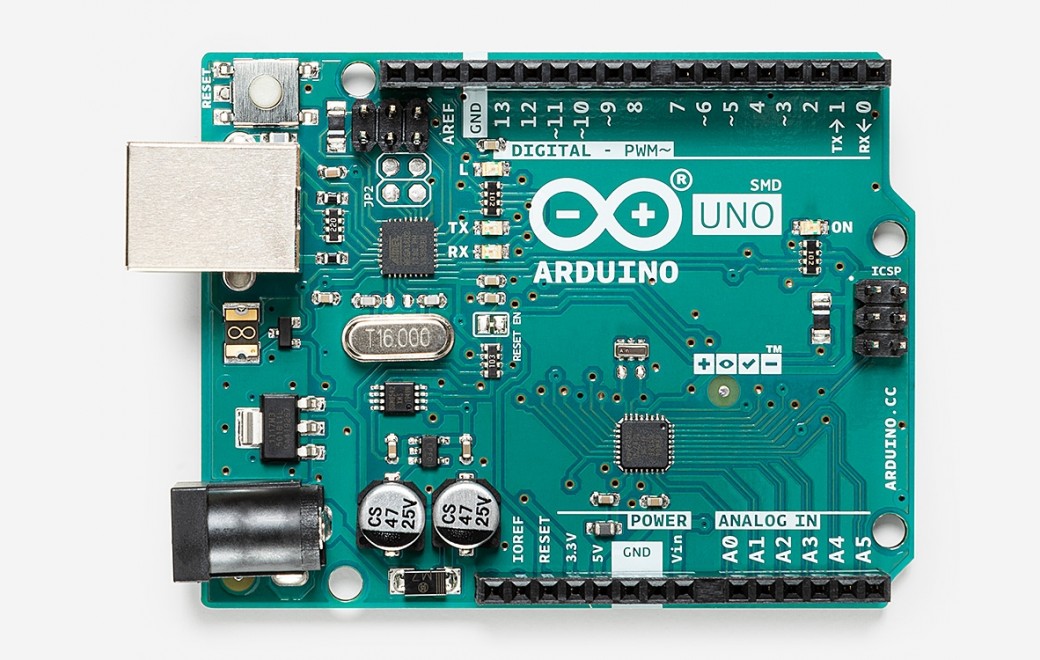
Arduino comes with a whole family of boards, but let’s just cover the most used one: Arduino UNO.
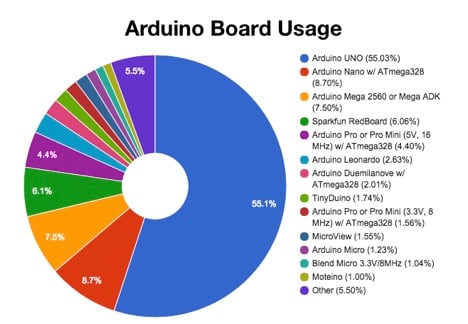
Arduino UNO is a small-sized 8 bits board that provides an easy to use microcontroller solution for your projects. Thanks to its IDE and software libraries, you can control LEDs, DC motors, servos, and many other digital and analog electronic components that cannot be connected directly to the computer. To accomplish that, the Arduino UNO board has digital and analog pins where you can connect the electronics.
To control the board, you can use the Arduino IDE to create C and C++ programs and to create your applications and install (flash) them in your Arduino. The IDE also has a collection of libraries to help you develop more complex applications like servos control, WiFi connectivity support, or radio communication. Also, there are libraries to support the Arduino Shields, boards that you can connect to your Arduino to extend its functionalities.
One thing to have in mind is that Arduino UNO has an 8-bit ATmega328P microcontroller. This means that you can use Arduino to control electronics without the problems of programming directly into the MCU. However, it has limited processing, storage, and memory capacities. Arduino UNO doesn’t support running an embedded operating system officially. Yet, there are some RTOS that you can run in your Arduino.
- FreeRTOS
- Simba
- Trampoline
- DuinOS
- OpenWrt
If you need to use an RTOS with official support in your project, you can use the Arduino YUN board that comes with a Linux based operating system. The Arduino YUN has an Atheros AR9331 MIPS, which grants the board network capabilities. It uses a web interface to program the board.
These are the technical specifications for the Arduino UNO. Other Arduino boards have different specifications; you can check them on the Arduino website.
Features
Specifications
Processor
Specifications
8 bits ATmega328P microcontroller with 16 MHz of speed
Connectivity
Specifications
14 Digital I/O pins (6 can be converted to PWM)
6 PWM pins
4 Analog pings
1 USB port (Serial over USB communication only)
Can extend connectivity with Shields (WiFi, Ethernet, SIM, among others)
Memory
Specifications
SRAM 1 KB
EEPROM 2 KB
Flash Memory 32 KB (0.5 KB are used by the bootloader)
Programming Language
Specifications
C
C++
Supported OS
Specifications
No official support
Benefits of Embedded Computers by Arduino
Arduino makes electronics prototyping, embedded system design, and electronics control very easy for beginners. You need to use C or C++ to program your application but the Arduino libraries make the development a fast and pleasant experience.
Arduino is perfect for you if you are:
- a beginner looking to start in the embedded board
- a professional who doesn’t want to program the MCU directly and use assembly language or a very low-level C/C++
Arduino is a low-cost board. You can purchase the Arduino UNO for only $23 in the Arduino store. The IDE is open-source software that you can download for free from the Arduino website.
Arduino UNO is licensed under the Creative Commons Attribution-Share-Alike license and the Arduino software is licensed under the LGPL and the GPL license.
Advantages of the Arduino Board
- It is open-source
- It provides its own IDE
- It is easy to use
- It provides access to many shields that extends the functionalities
Disadvantages of the Arduino Board
- It has low hardware resources for complex projects
- It doesn't use an OS (Arduino Yun supports Linux based OS)
2. Beagleboard
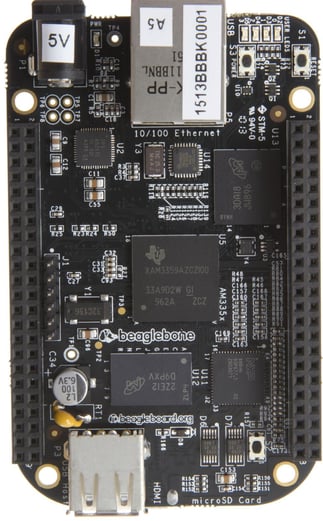
As stated on their website, Beagleboard is a “credit-card sized, low-power, open-hardware computer” manufactured by the Beagleboard Foundation and designed by Texas Instrument in association with Dig-Key and Newark Element14. It was first released in the USA in 2008 under the Creative Commons Share-Alike license.
Embedded Devices Examples for Beagleboard
You can use Beagleboards in any embedded project and device. You can also utilize the Beagle Blue or the Beagle AI, even though they are optimized for robotics. These are some use cases that you can find on the Beagleboard Brief webpage:
- Network-connected digital signage
- 3D user interface development (Clutter, etc.)
- Game console / Gaming platform emulator
- Web browser for the TV
- Multimedia codec and framework development
- Home networked media (DLNA/XMPP) server/client
- Security camera analyzer, streamer, recorder, and monitor
- Vehicle telematics and automation
- Software-defined radio or Mobile digital television
- Robotics
- Home automation
There are also many projects built by the community available on the Project Site.

Beagleboard - Embedded Computer Specifications
Beagleboard is a board family based in 32 bits ARM Cortex processor running Linux based embedded operating systems. There are mainly 8 Beagleboards:
- Beagleboard
- Beagleboard-xm
- BeagleBone
- BeagleBone Black
- Beagle AI
- BeagleBone Blue
- Beagleboard-X15
- Beagle Pocket
The specification varies from one to another. Although the Beagle AI and the BeagleBone Blue are mainly optimized for robotics applications, you can use them as well as the other boards for any type of project. In this post, you will learn more about the BeagleBone Black, which is the most popular Beagleboard.
The BeagleBone Black comes with a Linux Distribution installed out of the box. You can also change it to any of the supported OS:
- Debian
- Ubuntu
- Android
- Windows
- Fedora
- QNX
- FreeBSD
- ...as well as Embedded CE, Angstrom Distribution, Arch Linux, Gentoo, Sabayon, Buildroot, Erlang, StartedWare (No OS).
Also, you can follow some of the tutorials available to build your own Linux image for your board. Keep in mind, this method requires some medium to advanced Linux knowledge.
To create applications for your BeagleBone Black, you can use the Cloud9 IDE with the Linux system distributed with the board. Also, you can use any development environment and programming language. In some cases, you will have to configure a toolchain to cross-compile your program and its dependencies. This can add a layer of complexity to your project.
You can extend your BeagleBone Black (or any other Beagleboard) with Capes. Capes are equivalent to Arduino Shield. They are boards that extend the features of your board like SIM support, video game screen, and controller, or cameras. You can find many Capes on the Beagleboard website.
Features
Specifications
Processor
Specifications
32 bits AM335x 1GHz ARM CORTEX-A8 processor
Connectivity
Specifications
Ethernet
USB Host
HDMI
2 46 pins expansion connector
Serial Debug Port
WiFi (Only for the BeagleBone Black wireless)
Memory
Specifications
512MB DDR3L RAM
4GB onboard flash (storage)
Programming Language
Specifications
Any supported languages
Supported OS
Specifications
Debian, Ubuntu, Android, Windows Embedded CE, Angstrom Distribution, Arch Linux, Gentoo, Sabayon, Buildroot, Erlang, Fedora, QNX, FreeBSD, StartedWare (No OS)
Advantages of Beagleboard Embedded Computers
Beagleboard makes it easy to start with embedded systems projects if you know programming or have a computer background. The difficulty can increase if you need to cross-compile dependencies or even work with some of the ports. So if you are a beginner, Beagleboard can be a little difficult to start with.
Although, the cost of the boards varies, they are relatively cheap compared to their hardware capacity. The BeagleBone Black costs $63.24
Beagleboard is licensed under the Creative Commons Share-Alike license.
Advantages of the Beagleboard
- It is open-source
- It inexpensive
- It has great specifications for embedded system development
- It can use any languages
- It supports many operating systems
Disadvantages of the Beagleboard
- It can be difficult to use
- It might require cross-compilation
3. Raspberry Pi

Raspberry Pi is a single board computer (SBC) created by the Raspberry Pi Foundation in the UK. It was first released in 2012. One of the foundation goals is to bring knowledge to the people about how computing works and how to create new things with it. The project has a strong orientation towards the educational field. It is also one of the most used boards to teach programming and embedded systems to children. Hobbyists and professionals also use Raspberry Pi in various embedded projects.
Examples of Embedded Systems with Raspberry Pi
You can find Raspberry Pi in different educational and hobbyist projects for robotics, embedded systems, and personal computing. You will also see professionals using Raspberry Pi for rapid prototype building.
If you want to learn more about Raspberry Pi projects, check out their website. You will find tutorials, documentation, and DIY projects.
Raspberry Pi - Embedded Computer Specifications
Raspberry Pi has many models, but in this article, you will learn more about the Raspberry Pi 4. It comes with a 64 bits quad-core ARM processor, and up to 8GB of RAM. This board doesn’t have onboard storage, so you need to use a micro SD card to install your OS and your applications.
The Raspberry Pi 4 has WiFi and Bluetooth connectivity, an Ethernet port, USB, and two HDMI video outputs. The board also comes with 40 GPIO pins and two camera ports.
You can extend the functionalities of your board further with any of the Shield builds. From motor controllers to radio frequency communication modules, there are a great number of shields available for this board.
Raspberry Pi officially supports a Linux based OS, Raspbian. You can also try to compile your own Linux distro for the board. To create your applications, you can use the language you prefer. On some occasions, you will need to configure a toolchain and your IDE to cross-compile your program and its dependencies. Raspberry also officially supports Scratch that will let you program applications in a block-based visual programming language. If you are a non-programer who would like to start using the Raspberry Pi or want to introduce your children to the computing world, this is a great option.
Features
Specifications
Processor
Specifications
64 bits Quad-core Cortex-A72 (ARM v8)
Connectivity
Specifications
Wireless, Bluetooth, Ethernet
40 GPIO headers
2 USB 3.0, 2 USB 2.0
2 HDMI video outputs
2-lane MIPI DSI display port
2-lane MIPI CSI camera port
4-pole stereo audio and composite video port
Memory
Specifications
From 2GB to 8GB 8GB LPDDR4
Programming Language
Specifications
Any supported languages
Supported OS
Specifications
Raspbian
Advantages of Raspberry Pi in Embedded Systems
This board is the easiest to use for beginners and requires no programming or computer knowledge to start. Also, the great amount of shield removes the need to work with electronics to create new devices.
The board is license under the GPL license and costs $35.
Benefits of the Raspberry Pi
- It's inexpensive
- It's easy to use
- It's open-source
- It offers many shields to extend the board functionalities
- It allows you to use any programming language that is supported by the operating systems
Disadvantages of the Raspberry Pi
- It only supports Linux
- External storage might be needed
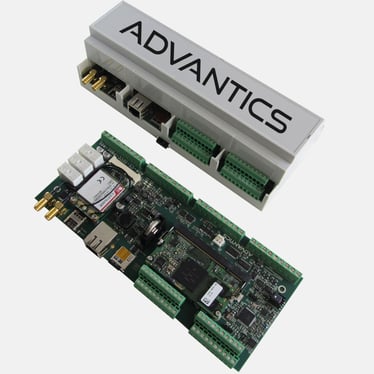
4. Toradex i.MX
Toradex Verdin is a family of computers in modules made by Toradex. It is an industrial level solution for embedded systems.
Examples of Embedded Applications with Toradex i.MX
You can use Toradex boards to create embedded devices for many fields. Right now, Toradex is applied in the following cases:
- Aerospace
- Automotive
- Defense Systems
- Digital Signage
- Entertainment
- Edge Computing
- Robotics
- Medical Devices
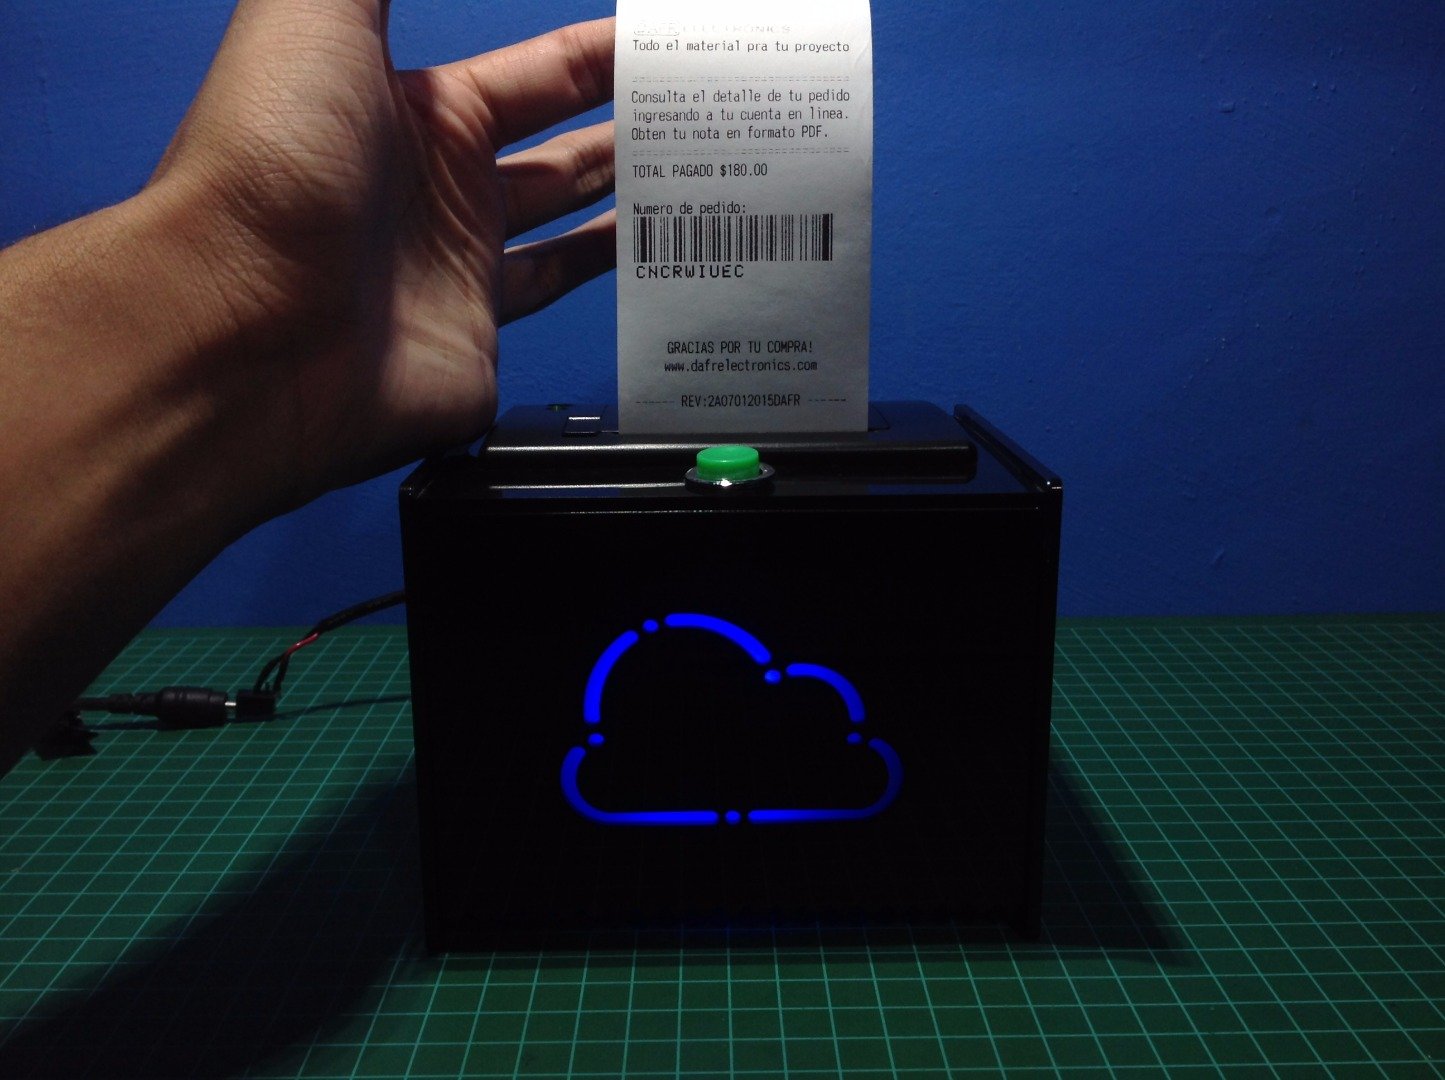
- Retails and Ticketing
Some examples of Toradex in commercial applications are: Interface Box for Medical Infusion Pump, Quilla, or MyTapp.
Toradex i.MX - Embedded Computer Specifications
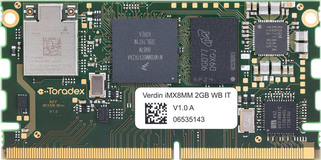
Toradex Verdin module comes with a different set of specifications depending on the model. You can choose between the iMX8M mini, iMX8M nano, or the iMX8M plus board. Each module comes with up to 4 Arm Cortex-A53 processor and 1 Arm Cortex-M4F microcontroller, up to 4 GB of RAM, and up to 128GB of flash memory storage.
This board doesn’t have any ports or pins. To use the iMX8M module, you need a development board or a custom carrier board. The development board has all the communication ports you need to create your embedded device.
You can use out of the box Embedded Linux, Windows Embedded, Toradex Embedded System, or Toradox. You can also build your Yocto image. There are Yocto recipes with preconfigure libraries as Qt for you to use. To develop your application, Todarex offers a toolchain for Linux and Windows. You can then configure it with your IDE of preference to program in C or C++.
In the next table, you can see the specification for the Verdin iMX8M board.
Features
Specifications
Processor
Specifications
Up to 4x Cortex-A53
1x Cortex-M4/M7
Connectivity
Specifications
WiFi, Bluetooth, Ethernet
ISC, SPI, QSPI, UART, PWM, GPIO, JTAG
Analog ports
2GB LPDDR4 RAM
16 GB flash storage
Memory
Specifications
From 2GB to 8GB 8GB LPDDR4
Programming Language
Specifications
C, C++
Supported OS
Specifications
Toradex Embedded Linux
Embedded Linux
Toradox
Windows Embedded
INTEGRITY
QNX
Benefits of Embedded Systems using Toradex i.MX
The Toradex board is not recommended for beginners. Nevertheless, it has a great amount of documentation on their website. It also documents how to create a Linux version for the board and how to configure a toolchain and your IDE.
The cost for the Verdin iMX8M module goes from $67.75 to $131.40. The development Board costs $318. The board is licensed under a proprietary license.
Advantages of the Toradex Board
- It is industrial proven
- The CPU and memory give you a lot of computation power
Disadvantages of the Toradex Board
- It is fairly expensive
- It requires additional boards to run
- It is not suited for beginner embedded developers
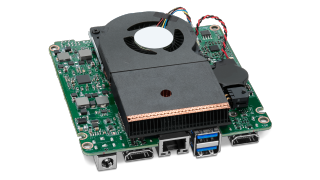
5. Nvidia Jetson

Nvidia Jetson is a series of boards developed by Nvidia meant for IA and robotics projects. First released in 2014, Jetson is an embedded development board that takes advantage of the Nvidia GPUs power to enable you to create machine learning based devices.
Embedded Project Examples with Nvidia Jetson
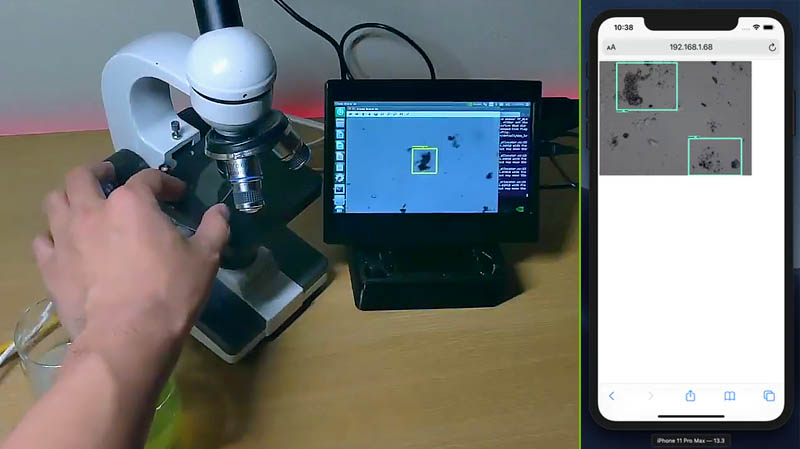
These boards are mainly used for robotics and Artificial Intelligence (AI); Nvidia Jetson has a developer community that showcases different projects that use the development kit.
Nvidia Jetson - Embedded Computer Specifications
These boards come with an ARM CPU and a Maxwell GPU to bring extra processing power, which makes them perfect to run AI applications. The memory RAM starts at 4GB and some models have 32GB eMMC storage.
The Jetson board consists of two parts:
- the Jetson module that holds its CPU and GPU
- the Jetson Development Board, which includes all the ports the Jetson needs.
The board comes with 4 USB 3.0 ports, 1 HDMI and 1 DP video output, and 1 Ethernet port. But that’s not all. The board also has GPIO, UART, IC2, and SPI ports to extend its capabilities. One important thing to notice is that the GPIO ports have the same configuration as Raspberry Pi so you can use some Raspberry Shields with the Jetson. You can also use the Raspberry camera module.
To program your board, Nvidia offers a Linux based distribution and the Jetpack SDK. You can choose between C, C++, and Python programming languages to create your applications. You also have access to many libraries to create complex software like CUDA. They allow you to implement computer vision, IA, graphics computing and more.
The following table shows the specifications for the Nvidia Jetson Nano.
Features
Specifications
Processor
Specifications
1GHz Quad-core ARM A57
128-core Maxwell GPU
Connectivity
Specifications
Ethernet port
4 USB 3.0 port
HDMI and DP output
GPIO, I2C, I2S, SPI, UART
Memory
Specifications
4 GB 64-bit LPDDR4 RAM
MicroSD for storage (other models comes with eMMC storage)
Programming Language
Specifications
C
C++
Python
Supported OS
Specifications
Linux
Benefits of Nvidia Jetson for Embedded Applications
If you are a beginner and would like to use this board for embedded systems projects, this might not be the best choice. On the other hand, it comes with an IDE for developing your own application. You can also use some Raspberry Pi Shield to create your own devices.
The Jetson Nano board development kit costs $99 in the Nvidia website store. Other models that can cost up to $699. They are licensed under a proprietary license.
Advantages of the Nvidia Jetson Board
- It has great processing power
- It includes a GPU
- It provides an SDK
- It is compatible with Raspberry Pi
Disadvantages of the Nvidia Jetson Board
- It sells at a higher price compared to other boards
- It only provides support for one operating system
6. Intel Nuc
Intel also has an alternative for embedded systems. the Intel Nuc consists of several boards that make up the Intel Nuc family.
Usage Examples of Intel Nuc in Embedded Systems
The Intel Nuc feels more like a desktop PC than an embedded system. It uses Intel Core 64 bits processors that will make your experience near to be using your own PC. In the Intel Nuc website, they claim that the board is ready for industrial application. Sadly, they don’t showcase professional or community projects or examples.
Intel Nuc - Embedded Computer Specifications
The Intel Nuc boards have Intel core i7, i5 0r i3 processors depending on the model. You can add an SSD hard drive and SO-DIMM memories to the board. It also comes with WiFi, Ethernet, 4 USB ports and HDMI output.
This board supports Windows 10 and Ubuntu Linux. You can use it for embedded system projects or a personal computer.
To program your board, you can use any programming language and IDE of your choice. The process is the same as programming on your own computer.
Features
Specifications
Processor
Specifications
Intel i7, i5 or i3 processor
Intel UHD Graphics
Connectivity
Specifications
WiFi
Ethernet port
3 USB 3.0 port
1 USB 2.0 port
1 USB C port
HDMI output
Memory
Specifications
Up to 64GB
SDD hard drive
Programming Language
Specifications
Any programming language supported by the OS
Supported OS
Specifications
Windows 10
Ubuntu
Benefits of Intel Nuc Embedded Boards
Intel Nuc is simple to use because it is similar to working on your PC. The boards’ prices go from $649 to $1049 in the Intel store.
Advantages of the Intel Nuc Board
- It is easy to use
- It feels like working on your own PC
- It supports Windows and Linux
- It allows you to use any supported programming languages
Disadvantages of the Nvidia Jetson Board
- It sells at a higher price in comparison to the other embedded boards
- It doesn't offer any examples or use cases for the board in embedded system projects
Conclusion
When to Use Which Embedded Board?
In this post, you learned more about the 6 most popular embedded system boards. If you want to learn even more about what the embedded development world is all about, you can choose between the Arduino and the Raspberry Pi boards. They are a perfect point to start learning all the basics of how to create an embedded system software and hardware.
If you are a developer who wants to learn how to cross-compile your applications, create cross-platform programs, work with AI and robotics, configure a toolchain or compile an operating system, Beagleboard and Nvidia Jetson are for you.
If you are a company that is thinking about creating an embedded system and need support and a good industry and commercially tested solution, Toradex is a good way to start.
Lastly, there is the Intel Nuc. You can use it to create embedded systems and be applied in the industrial field. It also feels more like a desktop PC than an embedded system board.
Board
Usability
Price
Arduino
Usability
Easy
Price
Low
Raspberry Pi
Usability
Easy
Price
Low
Beagleboard
Usability
Medium
Price
Low
Nvidia Jetson
Usability
Medium
Price
Medium
Toradex Virdin
Usability
Hard
Price
High
Intel Nuc
Usability
Easy
Price
High
How to Develop Applications with Embedded Systems
Fortunately, all the above microcontrollers for embedded systems also support Qt as a feature-rich development framework. This means you have the option to use Felgo as well. But before we dig into it a bit deeper, let’s take a quick look at how to use Qt.
Qt is a C++ cross-platform app development framework that you can use to create applications for embedded, desktop, web, iOS and Android platforms. One of the biggest benefits of using Qt is that it runs cross-platform. It supports building apps for desktop and mobile as well. You can also target all the microcontrollers mentioned in this article.
And this is where Felgo comes into the picture. Felgo is based on Qt; however, it is so much more than a framework. When using Felgo, you have access to over 200+ APIs and components on top of Qt. Let’s take a look at some of them that you can utilize during your embedded app development:
Adaptive UI, Navigation Components, and Controls: Felgo allows you to create state-of-the-art user experiences. It also brings best practices from the mobile development world to other supported platforms, like embedded, desktop, or web. You get all the tools you need for creating user interfaces that look and feel nice. Felgo supports all kinds of different screen sizes and densities as well.
Maps, GPS and Sensors: You can use these components to create an application that tracks the position of the embedded device. For example, in a vehicle or to show maps to the user, you can access the native sensor of your hardware and start getting location data really easy.
Connectivity and Networking: With Felgo, you don’t have to implement the communication between your client and server parts from scratch. With the HttpRequest API, you can connect to Restful services quickly. You can also dynamically fetch assets or code at runtime. This allows you to keep the initial app size minimal and load content as required.
Apart from the SDK components, Felgo also provides tools that will speed up and ease your development process. If you are developing embedded applications, the QML Hot Reload tool could be a lifesaver. It runs standalone as well as on Qt and Felgo and works on all embedded platforms.
With QML Hot Reload, you can gradually build your user interface, while simultaneously navigating it. Hot Reload even allows you to add any form of interaction to the running QML application, as you can also introduce new property bindings, functions or signal handlers.
When building embedded applications, Cloud Builds CI/CD is also a very suitable tool. With Felgo’s continuous integration and continuous deployment tool, you can easily automate building your application for any platform like embedded systems, Android, iOS, desktop or web. As there’s a lot of custom configuration required for your exact platform and board, it’s best to get in touch with Felgo for the initial Cloud Builds setup for your embedded project.
If you would like to kick-off or boost your embedded app development, feel free to contact Felgo’s team of experts.

Related Articles
How To Add Augmented Reality to your App
How To Add Machine Learning to your App
3 Practical App Development Video Tutorials
Most Popular Programming Languages
More Posts Like This

Best Practices of Qt on Mobile