
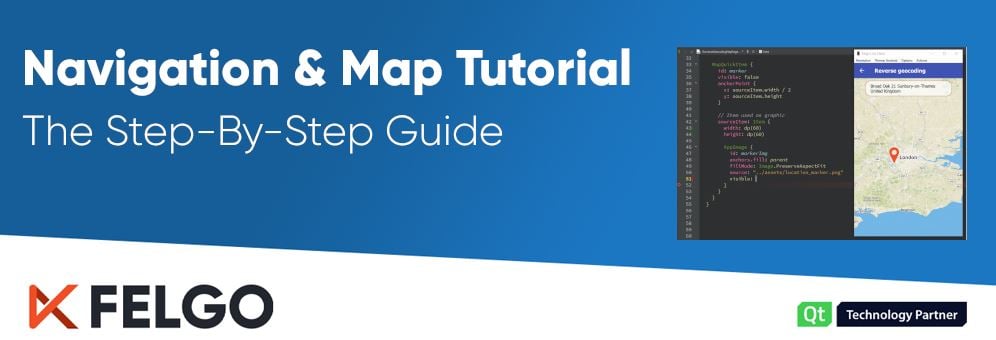
Maps and navigation are essential components of many apps. You can find the best restaurant around the corner, track where you wandered on your latest hike or view your travel pictures on a map with your destinations. Of course, they are also crucial in the automotive industry – just imagine a modern car without map and navigation capabilities.
In this article, you can find out how to add navigation and map features into your Qt applications with just 7 quick and easy steps. By following this step-by-step guide, you will learn how to create a location based app:
- Step 1: Add the AppMap to Your Application
- Step 2: Choose Your Map Provider
- Step 3: Design Your AppMap
- Step 4: Show User Position
- Step 5: Add Searchable Address Field
- Step 6: Set Up the Navigation
- Step 7: Display Routing Information
- Test Your Code with Felgo Hot Reload
- GPS Navigation with Real-Life Example
- Advance Your Skill
Let's start with the basics and see how to use map and location features in your app.
Step 1: Add the AppMap to Your Application
Adding a Map
The first step is pretty straightforward. You just need to add an AppMap item to your app:
import Felgo 3.0
import QtQuick 2.12
import QtLocation 5.12

App {
 AppMap { anchors.fill: parent }
}
Step 2: Choose Your Map Provider
Now, after adding a plugin and you should see a simple, but functioning map feature:
import Felgo 3.0
import QtQuick 2.12
import QtLocation 5.12

App {
 AppMap {
   anchors.fill: parent

   // configure map provider
   plugin: Plugin {
     name: "mapbox"
     // configure your own map_id and access_token here
     parameters: [
       PluginParameter {
         name: "mapbox.mapping.map_id"
         value: "mapbox.streets"
       },
       PluginParameter {
         name: "mapbox.access_token"
         value: "pk.eyJ1IjoiZ3R2cGxheSIsImEiOiJjaWZ0Y2pkM2cwMXZqdWVsenJhcGZ3ZDl5In0.6xMVtyc0CkYNYup76iMVNQ"
       }
     ]
   }
 }
}
Configuring the Plugin
Besides Mapbox, there are also other map providers you can choose from. Currently, QML supports the following plugins:
The main QML type to use here is the Plugin item which lets you access various map APIs.
In the case of the Mapbox plugin, you need to generate an access token on the provider website. Next, you’ll need to configure the plugin by creating PluginParameter objects with necessary values. In the case of Mapbox, you will need to provide access token and map ID.
If you want to try other map providers, all you need do is to change your plugin. Let’s give OpenStreetMap a shot. To make it work, just update the plugin name and parameters as shown below.
import Felgo 3.0
import QtQuick 2.12
import QtLocation 5.12

App {
 AppMap {
   anchors.fill: parent

   // configure map provider
   plugin: Plugin {
     name: "osm"
     PluginParameter { name: "osm.useragent"; value: "OSM usage example" }
     PluginParameter { name: "osm.mapping.host"; value: "http://osm.tile.server.address/" }
     PluginParameter { name: "osm.routing.host"; value: "http://osrm.server.address/viaroute" }
   }
 }
}
You can see that the look of the map has changed, but it is not the only thing. Various providers may expose different kinds of data and features: more precise routing, or access to geocoding.
If you want to further customize the map behavior, PluginParameters is the way to go. Create another PluginParameter item and then set the name and value parameters. With them, you can change things like:
- Memory cache size
- Cost strategy
- Directory of offline tiles storage
You can find more info about using plugin items with maps in Felgo documentation.
Step 3: Design Your AppMap
Customizing Map
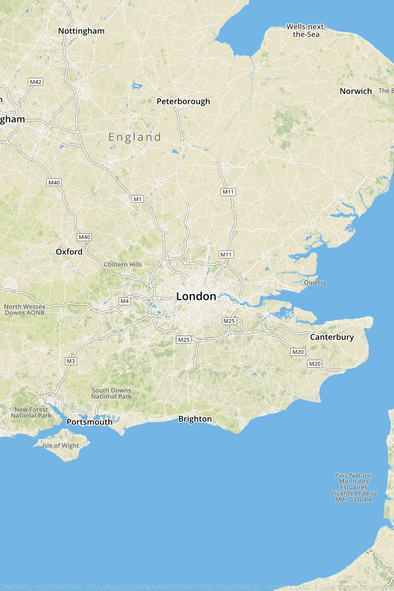
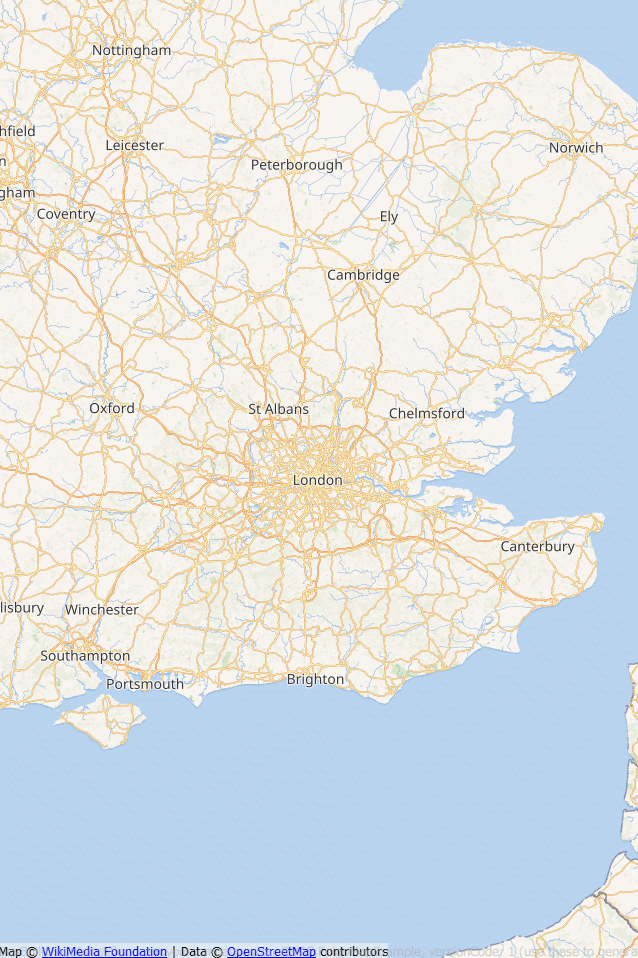
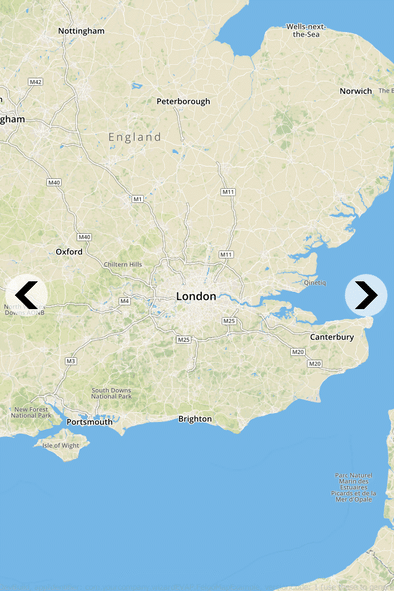
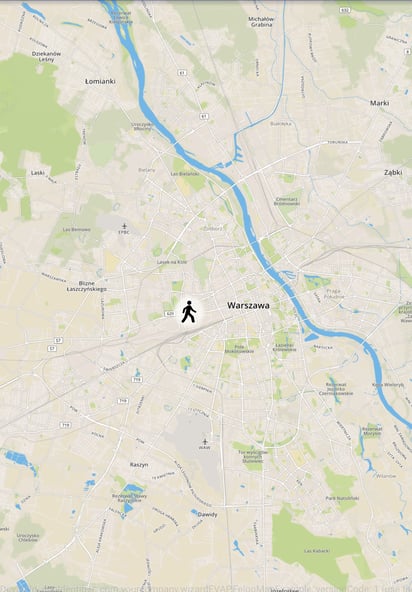
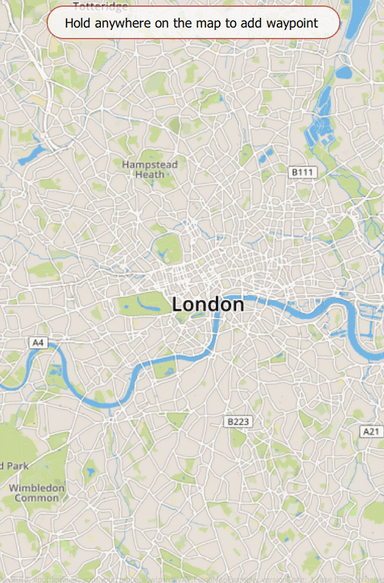
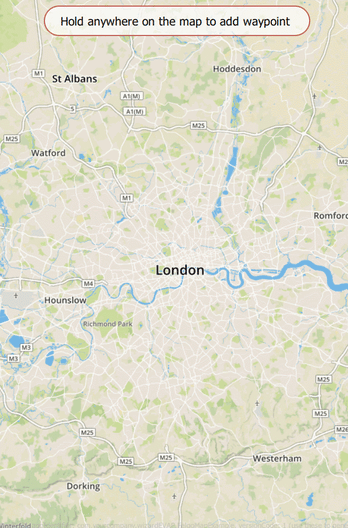
Changing the map supplier is not the only way to modify map appearance. You can simply set activeMapType property in AppMap to any value from the supportedMapTypes list. The available themes may vary according to the map provider.
import Felgo 3.0
import QtQuick 2.12
import QtLocation 5.12

App {
 property int mapTypeIndex: 1

 AppMap {
   id: appMap
   anchors.fill: parent

   activeMapType: supportedMapTypes[mapTypeIndex]
   plugin: mapboxPlugin
 }

 Plugin {
   id: mapboxPlugin
   name: "mapbox"
   // configure your own map_id and access_token here
   parameters: [
     PluginParameter {
       name: "mapbox.mapping.map_id"
       value: "mapbox.streets"
     },
     PluginParameter {
       name: "mapbox.access_token"
       value: "pk.eyJ1IjoiZ3R2cGxheSIsImEiOiJjaWZ0Y2pkM2cwMXZqdWVsenJhcGZ3ZDl5In0.6xMVtyc0CkYNYup76iMVNQ"
     }
   ]
 }

 IconButton {
   icon: IconType.chevronright
   size: dp(36)
   anchors {
     right: parent.right
     verticalCenter: parent.verticalCenter
     margins: dp(8)
   }
   // increase or start at 0 again if max index exceeded
   onClicked: mapTypeIndex = (mapTypeIndex + 1) % appMap.supportedMapTypes.length
 }

 IconButton {
   icon: IconType.chevronleft
   size: dp(36)
   anchors {
     left: parent.left
     verticalCenter: parent.verticalCenter
     margins: dp(8)
   }
   // decrease index or jump to max index if at the beginning
   onClicked: mapTypeIndex = (mapTypeIndex === 0) ? appMap.supportedMapTypes.length - 1 : mapTypeIndex - 1
 }
}
Let’s see how the map looks like when the appearance is changed.
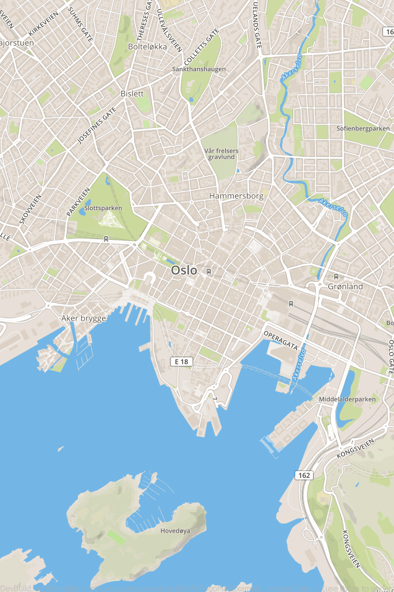
You can also programmatically adjust the zoom level or the center coordinates via properties. To center map in a certain location, you need to use the Qt Positioning module. Just call the static coordinate method and pass the place latitude and longitude as parameters.
import Felgo 3.0
import QtQuick 2.12
import QtLocation 5.12
import QtPositioning 5.12

App {
 AppMap {
   anchors.fill: parent
   center: QtPositioning.coordinate(59.91, 10.75) // Oslo
   zoomLevel: 14
   plugin: mapboxPlugin
 }

 Plugin {
   id: mapboxPlugin
   name: "mapbox"
   // configure your own map_id and access_token here
   parameters: [
     PluginParameter {
       name: "mapbox.mapping.map_id"
       value: "mapbox.streets"
     },
     PluginParameter {
       name: "mapbox.access_token"
       value: "pk.eyJ1IjoiZ3R2cGxheSIsImEiOiJjaWZ0Y2pkM2cwMXZqdWVsenJhcGZ3ZDl5In0.6xMVtyc0CkYNYup76iMVNQ"
     }
   ]
 }
}
Step 4: Show User Position
Displaying User Position
This is great, but where is the user? You can display its position with just two properties in AppMap:
import Felgo 3.0
import QtQuick 2.12
import QtLocation 5.12
import QtPositioning 5.12

App {
 AppMap {
   anchors.fill: parent
   showUserPosition: true
   enableUserPosition: true

   plugin: Plugin {
     name: "mapbox"
     // configure your own map_id and access_token here
     parameters: [
       PluginParameter {
         name: "mapbox.mapping.map_id"
         value: "mapbox.streets"
       },
       PluginParameter {
         name: "mapbox.access_token"
         value: "pk.eyJ1IjoiZ3R2cGxheSIsImEiOiJjaWZ0Y2pkM2cwMXZqdWVsenJhcGZ3ZDl5In0.6xMVtyc0CkYNYup76iMVNQ"
       }
     ]
   }

   // check for user position initially when the component is created
   Component.onCompleted: moveToUserPosition()

   // once we successfully received the location, we zoom to the user position
   onUserPositionAvailableChanged: moveToUserPosition()

   function moveToUserPosition() {
     if(userPositionAvailable) {
       center = userPosition.coordinate
        zoomLevel = 13
     }
   }
 }
}
Note: If you are deploying to Android, don’t forget to add ACCESS_FINE_LOCATION permission in the manifest!
Customizing the indicator is also fairly simple. All you need to do is to create MapQuickItem and bind a coordinate property to the user coordinates. The user position will update automatically and the marker position will follow.
Step 5: Add Searchable Address Field
Searching the Address
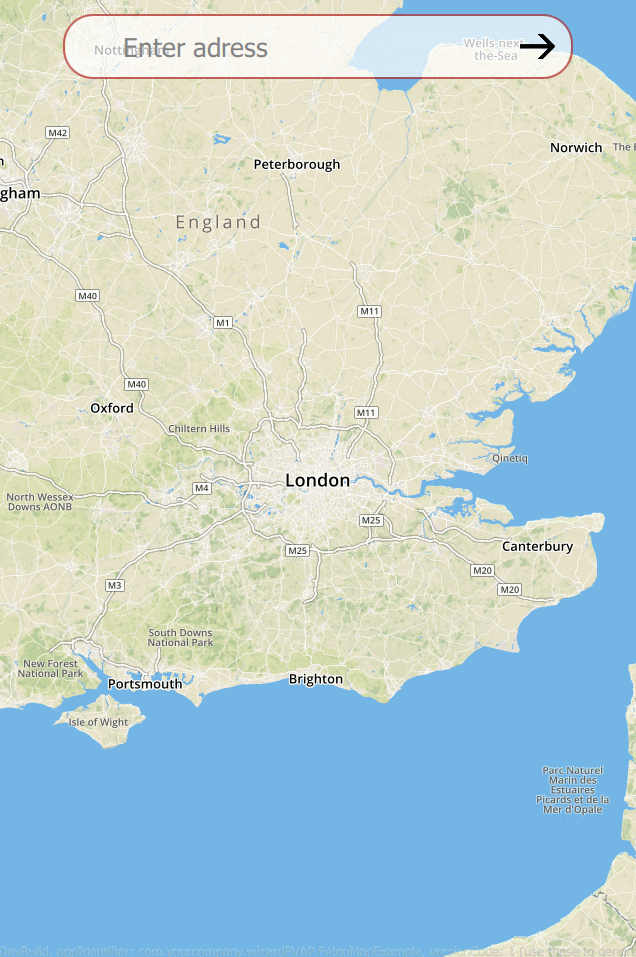
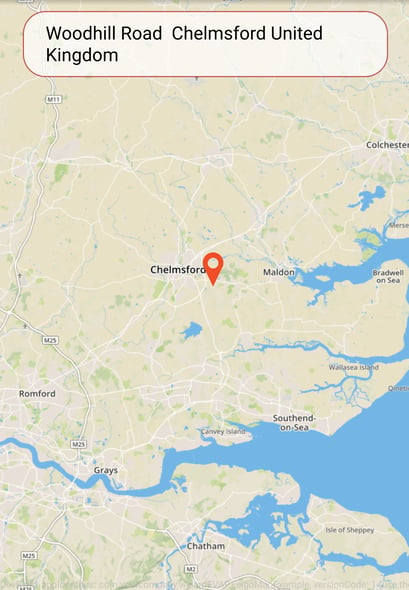
In many cases, you need to find an address given by the user and display it on the map. To do so, you need to use the GeocodeModel. Before examining this object, you need to know something about the process itself.
Geocoding
To put it in a few words – it’s a process of matching addresses or search strings with geographic locations. This procedure is essential for navigation. Don’t worry, using it in Qt is not complicated at all.
In the beginning, you need the GeocodeModel inside the app. Remember that the model won’t perform geocoding out of thin air – you need to provide a map plugin to process the data. To get the coordinates of the address, just input its name to model query. The location data will update automatically.
import QtQuick 2.12
import QtLocation 5.12
import QtPositioning 5.12
import Felgo 3.0

App {
Page {
 AppMap {
   id: appMap
   anchors.fill: parent

   // configure map provider
   plugin: mapboxPlugin

   MapItemView {
     id: mapItemView
     model: geocodeModel
     delegate: markerDelegate
   }

   //Component used as delegate
   Component {
     id: markerDelegate
     MapQuickItem {
       coordinate: locationData.coordinate
       anchorPoint {
         x: sourceItem.width / 2
         y: sourceItem.height
       }

       //Item used as graphic
       sourceItem: Icon {
         id: userMarker
         icon: IconType.mapmarker
         color: "red"
         size: dp(30)
       }
     }
   }
 }

 Plugin {
   id: mapboxPlugin
   name: "mapbox"
   // configure your own map_id and access_token here
   parameters: [
     PluginParameter {
       name: "mapbox.mapping.map_id"
       value: "mapbox.streets"
     },
     PluginParameter {
       name: "mapbox.access_token"
       value: "pk.eyJ1IjoiZ3R2cGxheSIsImEiOiJjaWZ0Y2pkM2cwMXZqdWVsenJhcGZ3ZDl5In0.6xMVtyc0CkYNYup76iMVNQ"
     }
   ]
 }

 GeocodeModel {
   id: geocodeModel
   plugin: mapboxPlugin
   autoUpdate: true
   onLocationsChanged: {
     appMap.center = get(0).coordinate
     appMap.zoomLevel = 10
   }
 }

 SearchBar {
   onAccepted: geocodeModel.query = text
 }

 AppActivityIndicator {
   id: busyIndicator
   anchors.centerIn: parent
   visible: geocodeModel.status == GeocodeModel.Loading
 }
}
}
Now that you finally have some address data, how can you display it? The MapItemView comes to save the day! Add it inside the AppMap item, bind the model to GeocodeModel, create a delegate, and voila! You can now see the addresses on the map.
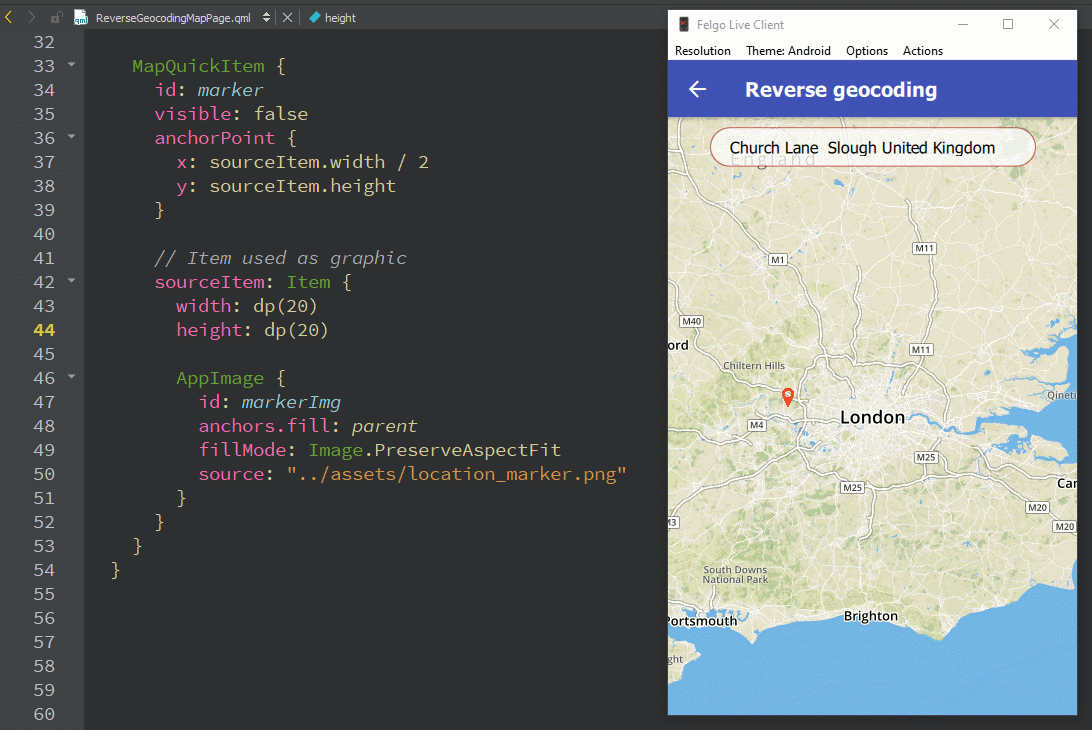
Reverse Geocoding
There might be a case when you want to indicate the address of the place selected by the user on the map. It’s a similar process to geocoding but reversed. Instead of matching addresses to coordinates, you match coordinates to addresses.
In this scenario, you can also use GeocodeModel. Instead of providing the address, you can simply pass map coordinates and the model will take care of the rest. To transform in-app coordinates to map coordinates, use the toCoordinate method from the AppMap item. After a query is complete, you can access the address data from the Location object returned by the get function. Piece of cake, right?
import QtQuick 2.12
import QtPositioning 5.12
import QtLocation 5.12
import Felgo 3.0

App {
 AppMap {
   id: appMap
   anchors.fill: parent
   plugin: mapboxPlugin

   MouseArea {
     anchors.fill: parent
     onPressAndHold: {
       marker.visible = false
       var coordinates = appMap.toCoordinate(Qt.point(mouse.x, mouse.y))
       geocodeModel.query = coordinates
       marker.coordinate = coordinates
     }
   }

   MapQuickItem {
     id: marker
     visible: false

     //Item used as graphic
     sourceItem: Item {
       Icon {
         icon: IconType.mapmarker
         color: "red"
         size: dp(30)
         anchors.horizontalCenter: parent.horizontalCenter
         anchors.bottom: parent.bottom
       }
     }
   }
 }

 Plugin {
   id: mapboxPlugin
   name: "mapbox"
   // configure your own map_id and access_token here
   parameters: [
     PluginParameter {
       name: "mapbox.mapping.map_id"
       value: "mapbox.streets"
     },
     PluginParameter {
       name: "mapbox.access_token"
       value: "pk.eyJ1IjoiZ3R2cGxheSIsImEiOiJjaWZ0Y2pkM2cwMXZqdWVsenJhcGZ3ZDl5In0.6xMVtyc0CkYNYup76iMVNQ"
     }
   ]
 }

 GeocodeModel {
   id: geocodeModel
   plugin: mapboxPlugin
   autoUpdate: true
   onLocationsChanged: {
     if(count > 0) {
       marker.visible = true
       var address = get(0).address
       addressLabel.text = address.street + " " + address.city + " " + address.country
     }
   }
 }

 AppText {
   id: addressLabel
   width: parent.width * 0.8
   color: "red"
   anchors {
     top: parent.top
     horizontalCenter: parent.horizontalCenter
     topMargin: dp(20)
   }
   fontSize: 16
   clip: true
   text: qsTr("Hold anywhere on the map to display address")
 }

 AppActivityIndicator {
   id: busyIndicator
   anchors.centerIn: parent
   visible: geocodeModel.status == GeocodeModel.Loading
 }
}
Step 6: Set Up the Navigation
Routing
Finding addresses is not the only feature we generally need, routing is also vital for map-based apps. No worries, Qt also has suitable tools to solve this problem. In this case, RouteModel is priceless.
This type is used similarly to GeocodeModel. After setting the plugin for the map provider, you can create a RouteQuery. There, you simply pass some coordinates and then the model tries to find the optimal way.
Below, you can see an example where the user can select two points on the map and the app will create a route from the start to the destination point. To visualize this path, you will use the MapRoute item. This time the model is not automatically updated, but requires a manual call to its update function.
import QtQuick 2.12
import QtLocation 5.12
import QtPositioning 5.12
import Felgo 3.0

App {
 AppMap {
    id: appMap
    anchors.fill: parent

    // configure map provider
    plugin: mapboxPlugin

    //Route visualization item
    MapRoute {
      id: routeItem
      opacity: 0.6
      smooth: true
      antialiasing: true
      visible: false
      line {
        color: "cornflowerblue"
        width: 5
      }
    }

    MapQuickItem {
      id: startMarker
      visible: false
      anchorPoint {
        x: sourceItem.width / 2
        y: sourceItem.height
      }

      //Item used as graphic
       sourceItem: Icon {
         icon: IconType.mapmarker
         color: "red"
         size: dp(30)
       }
    }

    MapQuickItem {
      id: destinationMarker
      visible: false
      anchorPoint {
        x: sourceItem.width / 2
        y: sourceItem.height
      }

      //Item used as graphic
       sourceItem: Icon {
         icon: IconType.mapmarker
         color: "red"
         size: dp(30)
       }
    }

    MouseArea {
      property bool isSettingStartMarker: true
      id: appMapMA
      anchors.fill: parent
      enabled: routeModel.status !== RouteModel.Loading

      onPressAndHold: {
        var coordinates = appMap.toCoordinate(Qt.point(mouse.x, mouse.y))
        if(isSettingStartMarker) {
          routeQuery.addWaypoint(coordinates)
          startMarker.coordinate = coordinates
          startMarker.visible = true

          //Hiding old route
          destinationMarker.visible = false
          routeItem.visible = false
          routeModel.reset()
          isSettingStartMarker = false
        }
        else {
          routeQuery.addWaypoint(coordinates)
          destinationMarker.coordinate = coordinates
          destinationMarker.visible = true
          isSettingStartMarker = true
        }

        /*
        If start and destination marker are set
        the route model need to be updated
        */
        if(routeQuery.waypoints.length >= 2){
          routeQuery.travelModes = RouteQuery.CarTravel
          routeModel.update()
        }
      }
    }
  }

  Plugin {
    id: mapboxPlugin
    name: "mapbox"
    // configure your own map_id and access_token here
    parameters: [
      PluginParameter {
        name: "mapbox.mapping.map_id"
        value: "mapbox.streets"
      },
      PluginParameter {
        name: "mapbox.access_token"
        value: "pk.eyJ1IjoiZ3R2cGxheSIsImEiOiJjaWZ0Y2pkM2cwMXZqdWVsenJhcGZ3ZDl5In0.6xMVtyc0CkYNYup76iMVNQ"
      }
    ]
  }

  RouteModel {
    id: routeModel
    plugin: mapboxPlugin
    autoUpdate: false
    query: routeQuery

    onStatusChanged: {
      //When model found a route pass show it
      if(status == RouteModel.Ready) {
        routeItem.route = get(0)
        routeItem.visible = true
        //Clear old route query
        routeQuery.clearWaypoints()
      }
    }
  }

  RouteQuery {
    id: routeQuery
  }
}
Step 7: Display Route Information
Route details
Showing the route on a map is one thing, but what if you want to display some information associated with it? get method from RouteModel returns the Route object, contains properties like distance or travelTime. Below, you will find an example of how to display route length using code from the routing section with just a few tweaks.
import QtQuick 2.12
import QtLocation 5.12
import QtPositioning 5.12
import Felgo 3.0

App {
 AppMap {
   id: appMap

   anchors.fill: parent

   // configure map provider
   plugin: mapboxPlugin

   //Route visualization item
   MapRoute {
     id: routeItem
     opacity: 0.6
     smooth: true
     antialiasing: true
     visible: false
     line {
       color: "cornflowerblue"
       width: 5
     }
   }

   MapQuickItem {
     id: startMarker
     visible: false
     anchorPoint {
       x: sourceItem.width / 2
       y: sourceItem.height
     }

     //Item used as graphic
       sourceItem: Icon {
         icon: IconType.mapmarker
         color: "red"
         size: dp(30)
       }
   }

   MapQuickItem {
     id: destinationMarker
     visible: false
     anchorPoint {
       x: sourceItem.width / 2
       y: sourceItem.height
     }

     //Item used as graphic
       sourceItem: Icon {
         icon: IconType.mapmarker
         color: "red"
         size: dp(30)
       }
   }

   MouseArea {
     property bool isSettingStartMarker: true
     anchors.fill: parent
     enabled: routeModel.status !== RouteModel.Loading

     onPressAndHold: {
       var coordinates = appMap.toCoordinate(Qt.point(mouse.x, mouse.y))
       if(isSettingStartMarker) {
         routeQuery.addWaypoint(coordinates)
         startMarker.coordinate = coordinates
         startMarker.visible = true

         //Hiding old route
         destinationMarker.visible = false
         routeItem.visible = false
         routeModel.reset()
         isSettingStartMarker = false
       }
       else {
         routeQuery.addWaypoint(coordinates)
         destinationMarker.coordinate = coordinates
         destinationMarker.visible = true
         isSettingStartMarker = true
       }

       /*
       If start and destination marker are set
       the route model need to be updated
       */
       if(routeQuery.waypoints.length >= 2){
         routeQuery.travelModes = RouteQuery.CarTravel
         routeModel.update()
       }
     }
   }
 }

 Plugin {
   id: mapboxPlugin
   name: "mapbox"
   // configure your own map_id and access_token here
   parameters: [
     PluginParameter {
       name: "mapbox.mapping.map_id"
       value: "mapbox.streets"
     },
     PluginParameter {
       name: "mapbox.access_token"
       value: "pk.eyJ1IjoiZ3R2cGxheSIsImEiOiJjaWZ0Y2pkM2cwMXZqdWVsenJhcGZ3ZDl5In0.6xMVtyc0CkYNYup76iMVNQ"
     }
   ]
 }

 RouteModel {
   id: routeModel
   plugin: mapboxPlugin
   autoUpdate: false
   query: routeQuery

   onStatusChanged: {
     //When model found a route pass show it
     if(status == RouteModel.Ready) {
       routeItem.route = get(0)
       //passing info about route length
       routeLengthLabel.routeLength = get(0).distance
       routeItem.visible = true

       //Clear old route query
       routeQuery.clearWaypoints()
     }
   }
 }

 RouteQuery {
   id: routeQuery
 }

 AppText {
   property real routeLength: 0

   id: routeLengthLabel
   width: parent.width * 0.8
   visible: routeItem.visible
   anchors {
     bottom: parent.bottom
     horizontalCenter: parent.horizontalCenter
     bottomMargin: dp(20)
   }
   fontSize: 14
   clip: true
   //Displaying route length converted from m to km
   text: qsTr("Route length ") + (routeLength/1000).toFixed(1) + "km"
 }

 AppActivityIndicator {
   id: busyIndicator
   anchors.centerIn: parent
   visible: routeModel.status === RouteModel.Loading
 }
}
Congrats, You’ve Reached Your Destination
Now that you have a fully functioning map within your app, you can easily test the feature using Felgo Hot Reload. At this point, you can still add navigation items, new pages and subpages and adjust the content in your project. You can make any changes right in your running app and immediately see your modifications without ever leaving the screen.
GPS Navigation with Real-Life Examples
Your GPS navigation app is now ready to launch in the Android and iOS app stores. To ensure that your app remains successful in the competitive mobile app market, you’ll need to know what your app is up against on Google Play and Apple Store.
You can also use our list to come up with brilliant mobile app ideas for your next Android and iOS app project. Either way, knowing the major app categories and how they integrate GPS navigation into their application should be a must-know for all app developers.
GPS App Categories & Purposes
GPS Apps
First and foremost, the most obvious category is the GPS itself. These mobile apps are built to help you find the fastest and easiest route from your starting point to your destination. Besides driving assistance, you can also see public transportation schedules, find restaurants, bars, shops, or attractions in the area.
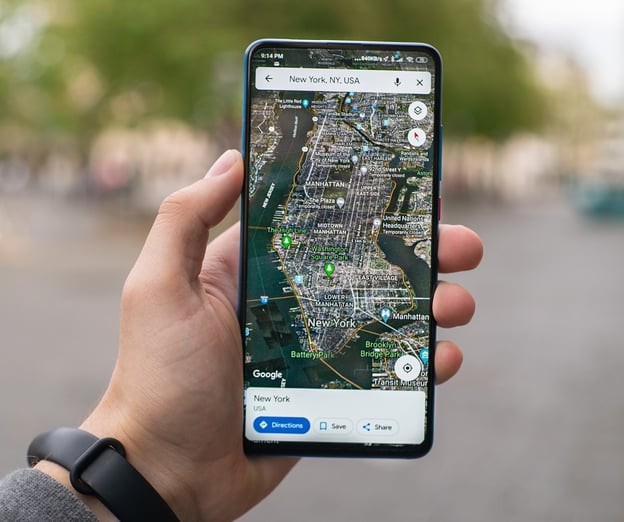
A great example of GPS apps is Google Maps, MapQuest or Waze.
Apps for Recommendations
When you are in an unfamiliar place, you will most likely look up the best places to go out to eat or the must-visit attractions in the city. To do so, you will rely on the feedback and recommendation of others. These apps are created to help you find business locations or major attractions.
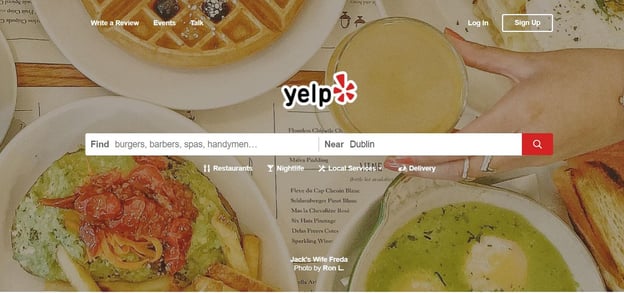
Yelp integrated the map and geolocation feature for this purpose. You can easily find the location of the recommended place within the app. You can also search for the easiest way to get there and plan other trips nearby.
Weather Apps
One of the main functionality of a weather app is the geolocation. With this technology, users can access real-time weather forecasts in their area. If you are thinking about developing your own weather app, geolocation integration is definitely a must-have.
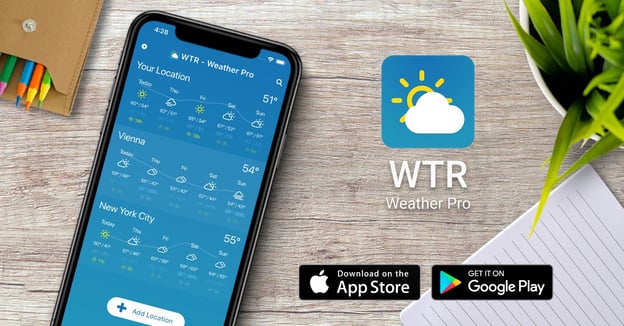
AccuWeather or Felgo’s WTR - Weather Pro is a great example of such apps. You can develop your own weather app using Felgo’s open source weather app example.
Augmented Reality Apps
Adding a navigation feature to your AR app can greatly enhance your mobile application. Opposed to virtual reality, AR enhances the world using advanced technology. For instance, you can mix your GPS navigation with real street images while driving.
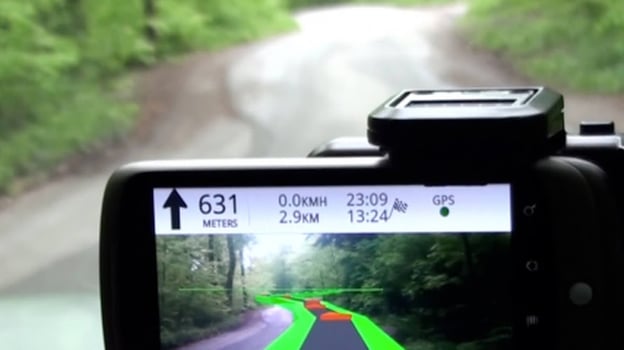
Wikitude Drive is one of the best AR navigation apps for Android devices. With Wikitude Drive, users can simply set GPS data as well as point-of-interest (POI).
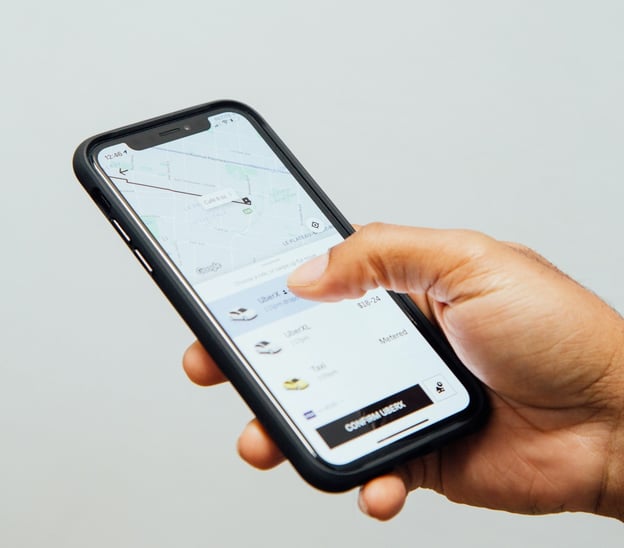
Services Provider Apps
If you make an app like Uber, Uber Eats or Lyft, you need to make sure that your users can follow the service they ordered. Users now expect to see the exact location of the cab driver or where the pizza delivery guy stuck in traffic. With the geolocation feature, you enable users to see the estimated time of arrival as well.
Sport Tracking Apps
Fitness applications use GPS navigation features to enable the users to track their route, measure distance, time or speed.
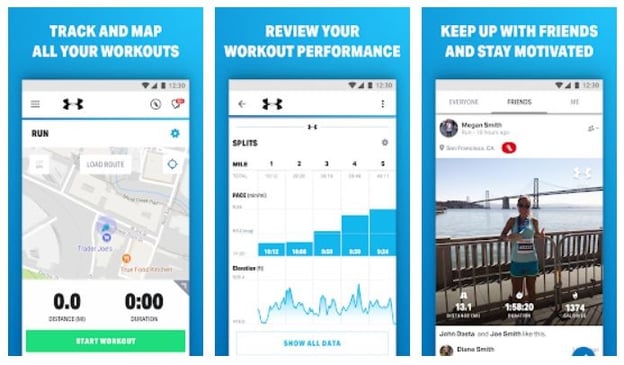
Runtastic or MapmyRun are just a few of the fitness apps that take advantage of the GPS features.
Would You Like To Advance Your Skills Further?
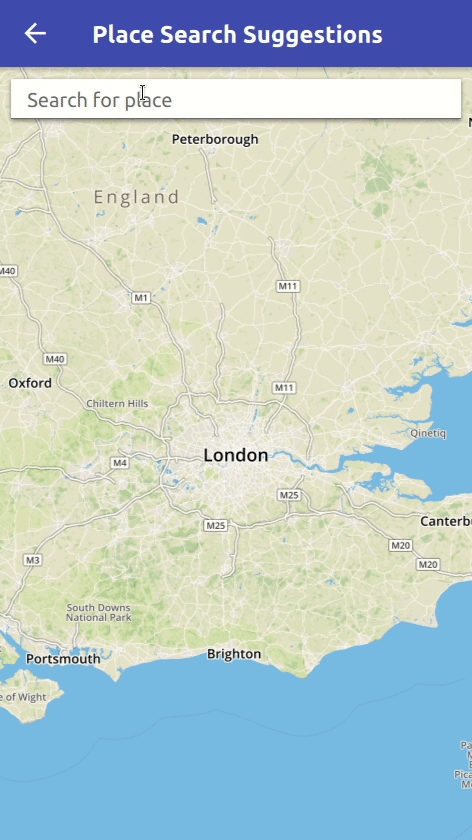
Feel free to check out the advanced map and navigation example project on GitHub. It includes all of the above examples, as well as an advanced example that offers a Place Search with auto-suggestion feature:
You should also check out the Felgo documentation for more helpful QML items.
In case you are considering outsourcing part of your app development, or would like to deepen your knowledge of developing with Qt, Felgo is here to assist you. From professional consulting and software development services to tailor-made app development training and workshops, Felgo can help you bring your app to life.

Related Articles
How To Add Push Notification to your App
How To Add Augmented Reality to your App
How To Add Machine Learning to your App
3 Practical App Development Video Tutorials
More Posts Like This

Best Practices of Qt on Mobile

Continuous Integration and Delivery (CI/CD) for Qt and Felgo


